

Micro Robotics for Schools: Kits, Projects and Buying Guide
September 1, 2026
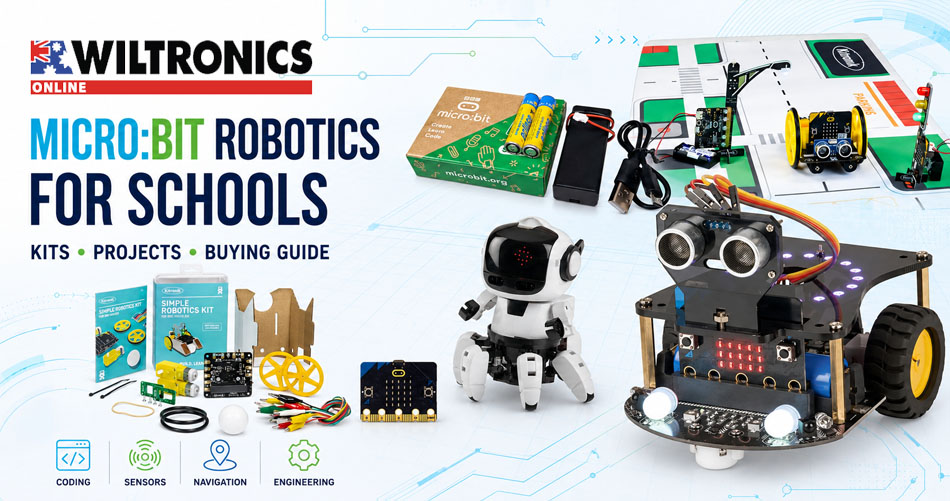
Micro Robotics for Schools: Kits, Projects and Buying Guide
Micro robotics for schools gives students an immediate reason to test and improve their code. A program no longer exists only on a screen: it makes a robot move, stop, turn, follow a line, avoid an obstacle or operate a mechanical attachment.
That physical response creates a powerful learning cycle:
predict → code → run → observe → debug → improve
The challenge for teachers and STEM coordinators is choosing hardware that matches the students, available lesson time and intended learning outcomes. A simple buggy may provide the best first experience, while a sensor-equipped smart car supports more advanced autonomous behaviour. Accessories can extend the same platform into traffic systems, gripping mechanisms and design challenges.
This guide compares current Wiltronics micro robotics options and presents a practical classroom pathway from beginner movement to independent engineering projects.
Why robotics works so well in STEM education
Robotics connects algorithms, digital inputs and outputs, motors, sensors, measurement, engineering design, testing and teamwork in one visible system.
Students also encounter authentic problems. Wheels may turn at slightly different speeds. A sensor may react differently under changing light. A robot may overshoot a stopping point. These are not simply failures; they provide evidence that students can use to revise their algorithm or mechanical design.
The Australian Curriculum: Technologies emphasises systems thinking, experimentation, problem-solving, prototyping and evaluation. Robotics can support Digital Technologies concepts such as algorithms, branching, iteration, variables and implementation, while also supporting Design and Technologies through engineered solutions and design processes.
Schools should confirm the specific content descriptions and achievement standards that apply to their state, year band and program.
Quick classroom robotics selector
| Classroom need | Recommended option | Micro included? | Why it fits |
|---|---|---|---|
| First robot with minimal assembly | Kitronik Motor | No | Integrated motors, wheels, battery holders and edge connector |
| Creative construction | Kitronik Simple Robotics Kit | No | No soldering and a customisable cardboard body |
| Servo-based buggy projects | Kitronik Mini MK2 | No | Continuous-rotation servos and accessible MakeCode control |
| Line following and obstacle avoidance | STEM Mini Smart Car | No | Infrared and ultrasonic modules plus Bluetooth control |
| Construction and character robotics | Tobbie Robot 2 bundle | Yes | Buildable robot and controller in one bundle |
| Reusable activity surface | Kitronik Mat | Not applicable | Line-following track and town layout |
| Mechanical manipulation | Kitronik Motor Klaw | No | Servo-controlled gripper for transport and sorting |
| Student-designed machine | Kitronik Compact Motor Driver | No | Controls two motors in custom builds |
Always confirm the current product page before ordering because bundle contents can change.
Best robotics pathway by year level
These bands provide a planning guide rather than fixed limits. Prior experience and lesson goals matter more than age alone.
| Student stage | Recommended starting point | Suitable focus | Logical extension |
|---|---|---|---|
| Years 3–4 | Simple Robotics Kit or Motor | Sequences, direction, timing and prediction | Decorated chassis or precision parking |
| Years 5–6 | Motor or Mini MK2 | Variables, functions, measurement and geometric paths | Activity mat or line-following add-on |
| Years 7–8 | Motor with sensors or Mini Smart Car | Branching, sensor thresholds, feedback and testing | Obstacle avoidance or traffic system |
| Years 9–10 | Mini Smart Car or custom motor-driver project | MicroPython, data, autonomous control and system integration | Delivery robot or evaluated design brief |
| Senior extension | Custom chassis and compatible sensors | Control strategies, optimisation and documented engineering decisions | Independent prototype with quantitative testing |
Begin with the learning goal—not the most complex robot
The best classroom robot is the one that makes the intended concept visible without introducing unnecessary setup.
For a first lesson, students may only need to move forward, stop, turn and return to the starting position.
An integrated chassis reduces assembly variables and gives students more time to work on sequence, timing and debugging. Later, sensors and attachments become valuable because the learning goal expands to decision-making, feedback and design.
Before purchasing, define the students’ experience, programming environment, lesson time, group size, assembly requirement, available devices, battery and storage procedures, and expected progression across year levels.
Platform 1: Kitronik Motor
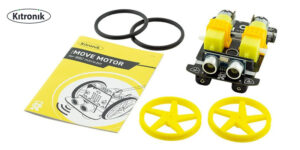
The Kitronik Motor for BBC micro provides a direct route into programmable movement. Students slot a micro into the edge connector and control two bi-directional DC motors with variable speed.
The chassis includes wheels with rubber tyres, four AA battery holders and a power switch. It requires no soldering or separate motor assembly, which makes it well suited to repeatable class lessons.
Suitable activities include timed movement, pivot turns, geometric paths, maze algorithms and investigations linking motor speed with distance. Students can then organise repeated commands with variables and functions.
Why it works for beginners
Students can reach a first successful movement quickly. The robot then provides a stable platform for deeper questions: Why does a 90-degree turn need calibration? Why does the robot drift? How should an algorithm respond when the battery voltage falls?
The goal is not perfect movement on the first attempt. Calibration and variation help students distinguish an abstract algorithm from its implementation in a physical system.
Best for: a fast, repeatable introduction with minimal mechanical setup. View the Kitronik Motor.
Platform 2: Kitronik Mini MK2
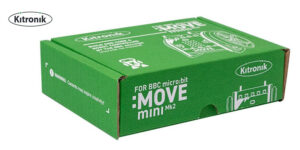
The Kitronik Mini MK2 Buggy Kit uses two continuous-rotation servo motors. Students control speed by changing the pulse-width modulation signal, with Kitronik MakeCode blocks helping simplify early programming.
The Mini suits classes that want more construction than the integrated Motor. It supports servo investigations, geometric drawing, remote control, chassis modification and iterative design.
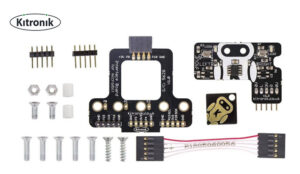
Schools can add sensor-based navigation later with the Kitronik Line Following Add-on for Mini V2, extending the chassis without replacing the original platform.
The platform does not include the micro, so purchasing teams should account for controllers, USB cables and suitable power arrangements.
Best for: classes that want servo control, chassis assembly and a clear line-following upgrade path. View the Mini MK2.
Platform 3: Kitronik Simple Robotics Kit
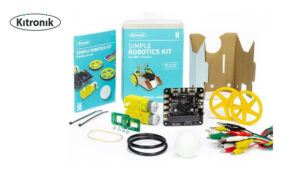
The Kitronik Simple Robotics Kit offers an entry-level robot that combines coding with creative construction. It requires no soldering and includes a cardboard body that students can cut, decorate or replace with their own chassis design.
This makes it valuable for integrated STEM projects. Students can investigate not only how the robot moves, but also how body shape, wheel clearance, component placement and mass distribution affect performance.
Suggested design brief
Design a student-bodied delivery robot that fits a maximum width, carries a payload securely, completes a marked route without manual contact and stops inside a target zone in three repeatable trials.
Students can use measured results to justify changes to code or construction.
Best for: integrated coding and design projects in which students customise the robot body. View the Simple Robotics Kit.
Platform 4: STEM Mini Smart Car
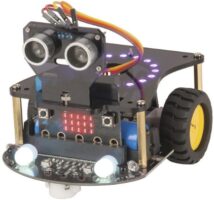
The STEM Mini Smart Car with BBC micro support adds infrared and ultrasonic modules. The robot can support line following, object following, obstacle avoidance and Bluetooth control from a compatible smartphone.
This platform suits students who already understand basic movement and are ready to work with feedback:
sensor input → programmed decision → motor output → new sensor input
Suitable investigations include comparing timed and sensor-controlled movement, tuning a line threshold, stopping at a selected distance, testing surface effects and evaluating obstacle-avoidance algorithms.
Sensor activities should include controlled testing. Students must identify environmental factors such as surface reflectivity, ambient light, obstacle shape and sensor position.
The kit requires a micro and a compatible 3.6–3.7V 18650 rechargeable battery, both purchased separately. Best for: students ready to integrate multiple sensors and autonomous behaviours. View the STEM Mini Smart Car.
Platform 5: Tobbie Robot 2
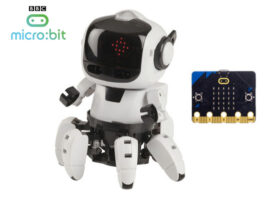
Wiltronics offers the Tobbie Robot 2 Construction Kit and a Tobbie Robot 2 bundle with the Micro V2 Development Board.
Tobbie provides a character-based construction project that can appeal to students who engage strongly with building and personality-driven robotics. It introduces a different physical form from a standard wheeled buggy and can support discussion about gait, balance, sensing and human-robot interaction.
Choose a construction robot when the assembly process forms part of the learning outcome. Choose an integrated buggy when coding time and repeatable classroom setup matter more than mechanical assembly.
Best for: an engaging build-and-code project. Choose the controller-inclusive bundle when the school does not already own micro boards.
Essential controller: Micro Go V2
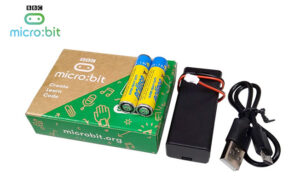
Many robotics products require a micro separately. The Micro Go V2 Development Board Kit supplies the controller, USB cable, battery holder and batteries, but it is not a standalone robotics chassis. Schools should verify exactly what each robot kit includes before ordering.
For a class rollout, confirm whether each group needs:
- one micro V2
- a USB data cable
- a battery holder or chassis power supply
- suitable batteries
- access to Microsoft MakeCode or MicroPython
- a computer or tablet that supports the chosen workflow
Avoid counting a controller twice when a bundle already includes one, and avoid assuming that every chassis includes the controller.
Purchasing note: Verify the contents on the current product page before ordering. Product bundles and availability can change.
Accessories that extend the learning pathway
Activity mat
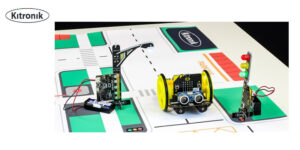
The Kitronik Mat provides an A1 double-sided surface. One side contains a line-following track; the other presents a town layout for traffic and navigation projects.
A standard surface improves comparison between groups because every robot encounters the same route. It also reduces time spent laying and removing tape tracks.
Motor Klaw
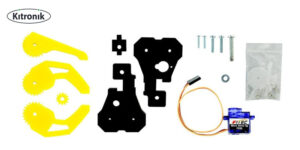
The Kitronik Motor Klaw adds a servo-operated gripper. Students can program opening and closing and combine those actions with navigation.
This enables collection, sorting, retrieval and delivery challenges using horizontal or vertical mounting.
Line detection
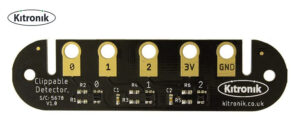
The Kitronik Clippable Detector Board can detect light and objects and support line-following applications with compatible hardware.
Line following introduces conditional logic and feedback. Students should calibrate the sensor on the actual surface rather than copying a threshold from another group.
Traffic-system accessories
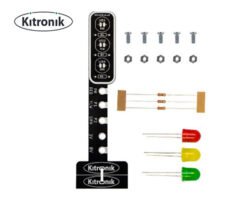
The micro robotics range includes the Kitronik STOP traffic light, Kitronik LAMP street light and Kitronik ACCESS barrier. Combined with the town side of the Mat, these accessories can turn a single robot into a larger programmed system.
Students can coordinate traffic lights, pedestrian crossings, access barriers, street lighting and vehicle stopping points. This shifts the lesson from programming one robot to designing interactions between system components.
Five progressive classroom robotics projects
Project 1: precision parking
Learning focus
Sequence, timing, measurement and calibration.
Mark a starting line and parking zone. Students program the robot to travel forward and stop completely inside the target.
They should complete at least three trials, record stopping distance and calculate the range or mean. Students then adjust one variable and repeat the test.
Extension
Add a turn before the parking zone or award points for accuracy and consistency rather than fastest completion.
Project 2: geometric navigation
Learning focus
Functions, iteration, angles and debugging.
Students program a square, triangle or repeated pattern. They create functions such as forward(distance) and turn(angle) where the programming environment and skill level allow.
Physical results will reveal that equal motor commands do not always create mathematically perfect paths. Students should calibrate and explain the difference.
Project 3: line-following investigation
Learning focus
Sensors, thresholds, branching and feedback.
Students test sensor readings over the line and background, choose a threshold and program corrective motor actions.
A basic algorithm might follow this logic:
- line centred: drive forward
- line detected on left: steer left
- line detected on right: steer right
- line lost: stop or search
Students can compare a simple on-off controller with smaller speed corrections and evaluate which produces smoother movement.
Project 4: obstacle-avoidance challenge
Learning focus
Distance sensing, conditional decisions and algorithm evaluation.
Using a compatible ultrasonic-equipped platform such as the Mini Smart Car, students program the robot to detect an obstacle, stop, turn and continue.
Assessment should consider:
- collision rate
- route completion
- time taken
- minimum clearance
- number of unnecessary turns
- performance with different obstacle shapes
Project 5: autonomous delivery system
Learning focus
Systems integration, project management and engineering design.
Students combine navigation with a Klaw or payload area. The robot must collect an object, follow a route and deliver it to a target zone.
Teams define functional requirements, constraints and success criteria before coding. They document each revision and use test evidence to justify the final design.
A six-lesson teaching sequence
| Lesson | Main activity | Coding concept | Student outcome |
|---|---|---|---|
| 1 | Explore hardware and run first movement | Sequence and outputs | Labelled system diagram and working program |
| 2 | Calibrate distance and turning | Variables and measurement | Trial table and revised movement values |
| 3 | Program a geometric route | Functions and iteration | Reusable movement algorithm |
| 4 | Add line or obstacle sensing | Inputs, branching and feedback | Sensor-controlled behaviour |
| 5 | Complete a design challenge | Decomposition and integration | Tested prototype |
| 6 | Evaluate and communicate | Evidence and iteration | Demonstration, data and design review |
Choosing group size and class quantity
Robotics works best when every student has a meaningful role. Groups of two or three often balance equipment cost with active participation.
Possible roles include:
- programmer
- test engineer
- data recorder
- mechanical designer
- safety and equipment manager
- project presenter
Rotate roles so one confident student does not control the computer for every lesson.
For a class of 24 students:
| Group arrangement | Robots required | Classroom effect |
|---|---|---|
| Pairs | 12 | Maximum coding and testing access |
| Groups of three | 8 | Strong balance of access and budget |
| Groups of four | 6 | Lower cost but requires clearly assigned roles |
| Demonstration station | 1–2 | Suitable for teacher modelling, not a full robotics program |
Schools should also consider one spare unit or a supply of commonly misplaced components so a single fault does not stop a group.
Three class-set approaches
| Purchasing approach | Suggested quantity for 24 students | What it supports |
|---|---|---|
| Starter or limited budget | 4 robots plus one teacher unit | Rotating stations, demonstrations and a pilot program |
| Core class set | 8 robots plus one spare | Groups of three with regular hands-on access |
| High-access class set | 12 robots plus one spare | Pairs, faster testing cycles and stronger individual accountability |
Buy the controllers, power arrangements and data cables at the same time as the chassis. Add one or two shared activity mats first; expand accessories after teachers confirm which challenges they will repeat.
MakeCode or MicroPython?
MakeCode
Microsoft MakeCode provides a visual block environment that reduces syntax barriers. It suits beginners and allows students to focus on sequence, logic, variables and behaviour.
Use MakeCode when:
- students have limited coding experience
- lesson time is short
- the goal is algorithmic thinking
- teachers need a consistent class workflow
- compatible product extensions provide custom blocks
MicroPython
MicroPython exposes students to text-based programming and supports a progression towards more advanced computing.
Use MicroPython when:
- students understand basic algorithms
- debugging syntax forms part of the learning
- the course requires text-based programming
- students need greater control over program structure
- the platform provides suitable examples and libraries
A school does not need to choose one environment permanently. Students can begin with blocks, view the generated code where supported and transition to text as their understanding develops.
For a broader platform decision before investing in a class set, compare the options in the Wiltronics guide to the best microcontrollers for schools: Arduino, Raspberry Pi Pico and ESP32.
Assessment rubric
| Criterion | Developing | Proficient | Advanced |
|---|---|---|---|
| Algorithm | Follows a supplied sequence | Designs a working sequence with decisions | Decomposes the task and uses efficient reusable structures |
| Implementation | Runs a basic program | Connects code, motors and sensors reliably | Integrates several behaviours and handles exceptions |
| Testing | Reports whether it worked | Records repeated results and changes one variable | Uses systematic evidence to compare revisions |
| Debugging | Makes unrecorded changes | Identifies a cause and tests a correction | Distinguishes code, sensor and mechanical causes |
| Evaluation | Describes the finished robot | Evaluates performance against criteria | Justifies trade-offs and proposes a specific next improvement |
| Collaboration | Completes an assigned task | Shares roles and records decisions | Coordinates workflow and uses peer feedback effectively |
Classroom management and safety
- Inspect battery holders, cables, wheels, axles and attachments before use.
- Switch robots off before fitting attachments or clearing moving parts.
- Keep fingers, hair and loose clothing away from wheels, gears and Klaw mechanisms.
- Use the specified batteries and observe correct polarity.
- Remove batteries before long-term storage where product guidance recommends it.
- Keep floor-based robots away from stairs, water and pedestrian traffic.
- Define test zones so robots do not leave benches or collide with other groups.
- Carry robots by the chassis rather than cables or sensors.
- Store each kit in a labelled container with a component checklist.
- Follow product instructions and the school’s risk-management procedures.
Teachers should test software access, cables, firmware and school-network permissions before the first class. A ten-minute technical check can protect a full lesson from preventable setup delays.
Troubleshooting common robotics problems
| Problem | Likely cause | Practical check |
|---|---|---|
| Robot does not power on | Flat batteries, incorrect polarity or power switch position | Replace or test batteries, confirm polarity and check the switch |
| Program downloads but robot does not move | Motor command, extension or chassis connection problem | Run a minimal motor test and confirm the correct MakeCode extension |
| Robot curves during straight movement | Motor variation, wheel friction or uneven surface | Inspect wheels, test on a consistent surface and calibrate left/right speed |
| Robot turns too far | Turn duration or speed is too high | Reduce one variable and repeat measured trials |
| Line sensor behaves inconsistently | Changing light, reflective surface or poor threshold | Record readings on both surfaces and recalibrate in the test location |
| Ultrasonic sensor misses an obstacle | Object angle, soft surface or sensor position | Test a flat solid target and check alignment and distance limits |
| Bluetooth control fails | Pairing, permissions or incompatible workflow | Confirm device compatibility and follow the product connection procedure |
| Servo jitters | Power, connection or conflicting commands | Check the servo lead, power arrangement and update rate |
Common purchasing mistakes
Buying the most advanced platform first
Extra sensors do not improve a lesson if students have not yet learned movement, sequence and debugging.
Forgetting the micro
Many chassis products exclude the controller. Check every product’s included and required items.
Ignoring batteries, cables and devices
A class set also needs charging or battery procedures, USB data cables and compatible computers or tablets.
Selecting a construction kit for a coding-only unit
Assembly can provide valuable engineering learning, but it consumes lesson time. Match the build requirement to the curriculum goal.
Using a different track for every group
Standardised activity mats or carefully measured layouts improve comparison and reduce setup time.
Treating robotics as a race only
Speed can reward unstable designs. Assess accuracy, repeatability, efficiency, documentation and improvement as well.
Purchasing without an expansion pathway
Choose a platform that can progress from movement to sensors and mechanical challenges if the school plans a multi-year program.
Frequently asked questions
What is the best micro robot for beginners?
The Kitronik Motor provides a strong starting point because it integrates the motors, wheels, battery holders and micro connector. The Simple Robotics Kit suits classes that want more creative construction.
Does a micro robot kit include the micro?
Not always. Many chassis and accessory kits require a micro separately, while some bundles include one. Check the current product contents before ordering.
How many robots does a class need?
Pairs provide the most access, while groups of three often offer a practical balance. A class of 24 would need 12 robots for pairs or eight for groups of three.
Can students use MicroPython for micro robotics?
Yes, when the chosen hardware provides compatible MicroPython support. MakeCode often gives beginners a faster start, while MicroPython supports progression into text-based programming.
What can students learn from line following?
Line following develops sensor calibration, conditional logic, feedback, testing and algorithm refinement. It also shows how environmental conditions affect an autonomous system.
Is soldering required?
Several featured platforms, including the Motor and Simple Robotics Kit, require no soldering. Other robotics products may require assembly or soldering, so verify the product requirements and match them to the students and facilities.
Final recommendation
A strong classroom robotics program should grow in deliberate stages:
- control movement
- measure and calibrate
- organise code with variables, functions and iteration
- add sensors and branching
- integrate navigation and mechanical actions
- evaluate performance against evidence
For a fast and repeatable introduction, start with the Kitronik Motor. Choose the Simple Robotics Kit when creative construction matters. Select the STEM Mini Smart Car when students are ready for line following, obstacle avoidance and sensor-controlled autonomy.
Add the Kitronik Mat and Klaw attachment to turn basic driving into repeatable navigation and engineering challenges.
© Electrotech Brands Pty Ltd 2026
Write a Comment
You must be logged in to post a comment.