What Are Jumper Wires: Know by Colour, Types and Uses
April 14, 2022
Jumper wires are must-have components in DIY electrical projects. But what exactly are they?
Most, if not all, electronics suppliers stock jumper wire in various lengths and assortments. These wires are commonly used with breadboards and other prototyping tools like Arduino.
Jumper wires make changing circuits as simple as possible. They come in a wide array of colours, too, but do they mean anything?
A jumper wire may appear uncomplicated, and it doesn’t get much more basic than other wires or cables. But there are tiny details you need to pay attention to.
Continue reading to learn the basics of jumper wires, their uses, types, and colour schemes.
What Are Jumper Wires?
Generally, jumpers are tiny metal connectors used to close or open a circuit part. They have two or more connection points, which regulate an electrical circuit board.
Their function is to configure the settings for computer peripherals, like the motherboard. Suppose your motherboard supported intrusion detection. A jumper can be set to enable or disable it.
Jumper wires are electrical wires with connector pins at each end. They are used to connect two points in a circuit without soldering.
You can use jumper wires to modify a circuit or diagnose problems in a circuit. Further, they are best used to bypass a part of the circuit that does not contain a resistor and is suspected to be bad.
This includes a stretch of wire or a switch. Suppose all the fuses are good and the component is not receiving power; find the circuit switch. Then, bypass the switch with the jumper wire.
How much current (I) and voltage (V) can jumper wires handle? The I and V rating will depend on the copper or aluminium content present in the wire.
For an Arduino application is no more than 2A and 250V. We also recommend using solid-core wire, ideally 22 American Wire Gauge (AWG).
Jumper Wire Colours
Although jumper wires come in a variety of colours, they do not actually mean anything. The wire colour is just an aid to help you keep track of what is connected to which.
It will not affect the operation of the circuit. This means that a red jumper wire is technically the same as the black one.
Even so, the colours can be used to your advantage to differentiate the types of connections. For instance, red as ground and black as power. Literally, what works for you!
Types of Jumper Wires
Jumper wires come in three versions:
- Male-to-male jumper
- Male-to-female jumper
- Female-to-female jumper
And two types of head shapes: square head and round head.
The difference between each is in the endpoint of the wire. Male ends have a pin protruding and can plug into things, while female ends do not but are also used for plugging.
Moreover, a male connector is referred to as a plug and has a solid pin for centre conduction. Meanwhile, a female connector is referred to as a jack and has a centre conductor with a hole in it to accept the male pin.
Male-to-male jumper wires are the most common and what you will likely use most often. For instance, when connecting two ports on a breadboard, a male-to-male wire is what you will need.
Alligator clips
Alligator clips are the ‘fancy’ versions of jumper wires. They consist of two spring metal clips connected by wire.
Their unique connection point allows alligator clips to be used in situations where it is tricky for a regular jumper wire. One of their most common uses is connecting the ports on a LilyPad Arduino board.
If you want to get fancier, it is possible to get jumper wires with a male pin connection on one end and an alligator clip on the other.
How to choose a jumper wire?
Now that you know the three types of jumper wires and their functions, you should be able to which head type to use. This also includes the head shape, though it may depend on the head type you have.
For instance, you are connecting an Arduino Uno pin with a breadboard. A male-to-male jumper is recommended. But if you are connecting it directly to an Ultrasonic Sensor, go for a male-to-female jumper.
Jumper Wires and Soldering
Can jumper wires be soldered? Yes, as long as the soldered wires are discernible on the opposite side.
Like a through-hole component lead, the outline of the wire in the solder connection should be visible. Jumper wire soldered to lifted or clipped components should also be insulated. This is to prevent shorting occurrences.
How do you solder a jumper?
- First step: Strip the wire, then open the strippers.
- Second step: Tin the wire.
- Third step: Solder the jumper to the board. Poke your tinned jumper end through your PC board.
- Fourth step: Clip the excess. Set your cutters close to the base of the wire.
- Fifth step: Desolder the joint.
How to Use Jumper Wires
Jumper wires are great for modifying a circuit or diagnosing problems in a circuit. The following steps show you how to use these wires in different applications safely.
Step 1
Your first step is to follow electrical safety precautions. Be cautious, especially when dealing with high-voltage circuits. But even with low-voltage circuits, you still need to be attentive.
Step 2
Know the suitable type of connector for the jumper wire. In some cases, you can use the bare wire ends to connect two circuit points. This is recommended if you have steady hands.
But to be safe, particularly if it is your first time, use alligator clips. Or soldering or some other type of connection for the jumper wire.
Step 3
Use the jumper wire to bypass part of the circuit or establish a connection between two points. This helps determine if a part of the circuit is faulty or broken.
Step 4
Connect the jumper wire to a voltmeter or ammeter for circuit property measurements. This allows you to get numbers between or across two points.
Step 5
Choose the right type of jumper wire if you are making a permanent modification to a circuit. The gauge and type of insulation are also essential considerations.
Step 6
Test circuit modifications with a temporary jumper wire before making a permanent connection. You can do this with solder.
Check the performance of the circuit with the temporary connection. This is to ensure that it works as you expect.
Get Your Jumper Wires Here!
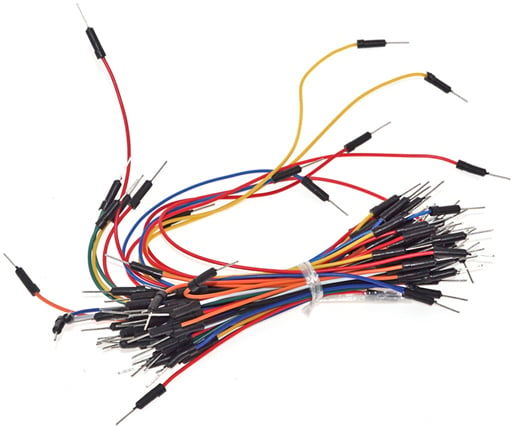
1. Flexible Breadboard Jumper Wires Male Pins (65 Pack)
Product code: MA3020
This jumper wire pack comes with 65 wires, ideal for any breadboarding application. Available in 4 sizes and 8 different colours.
The flexible stranded cores allow the wires to be bent and wound in any way imaginable. Plus, the hardened male tips on each end allow easy threading into any breadboard.
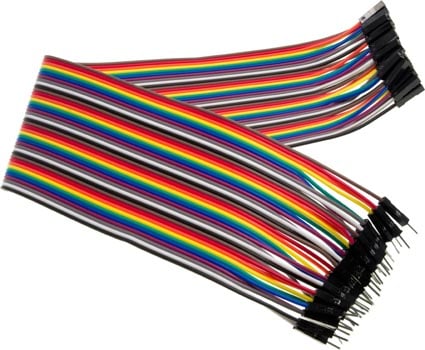
2. Jumper Connector Leads – Pack of 40
Product code: CN36xx
Premium jumper connector leads with male or female terminations. Perfect for connecting sensors and modules to your Arduino, Raspberry Pi, and more!
Available in Female-Female, Male-Female, Male-Male, and in lengths of 100, 200, and 300mm. We also have a set of 3 x 40pk Jumper Wires available.
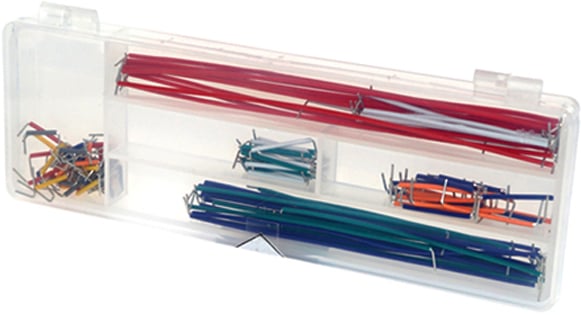
3. 140 Piece Breadboard Jumper Kit
Product code: MA4020
This kit contains 140 Jumper wires (10 pieces each of 14 different lengths) and 22 AWG Solid Wire Reusable. Ideal to use on breadboards to create electronic circuits.
Different coloured wires to identify easily. Pre-cut, stripped, and formed to suit a breadboard. Polypropylene storage case included.
The Bottom Line
If you are working with a breadboard or other prototyping tools, jumper wires come in handy. These colourful wires make changing a circuit as easy as possible.
By placing a jumper wire on the circuit, it also becomes possible to control the electricity. Not only that, but also stop the operation, and operate a circuit that does not work with ordinary wiring.
We hope this post has helped you understand the basics, including the types, colours and uses!
© Electrotech Brands Pty Ltd 2022
Write a Comment
You must be logged in to post a comment.