

School Microscope Buying Guide: Compound, Stereo or Digital?
August 19, 2026
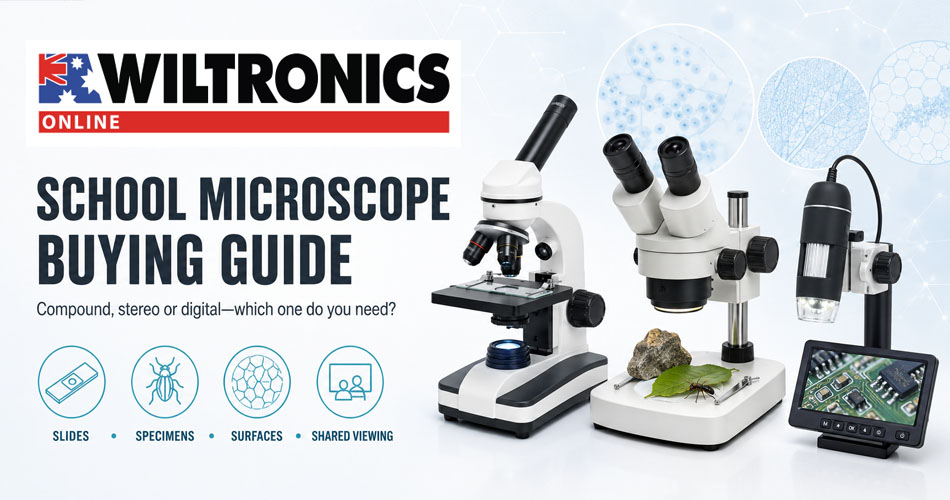
School Microscope Buying Guide: Compound, Stereo or Digital?
A compound biological microscope is designed for thin specimens mounted on slides. A stereo microscope provides a wider, three-dimensional view of solid objects such as insects, rocks and circuit boards. A digital microscope displays the image on a computer, tablet or built-in screen, making it useful for demonstrations, documentation and collaborative learning.
Choosing the right type first will produce better classroom results than comparing magnification alone. This guide explains the major microscope types and matches them to common applications, age groups and teaching requirements.
Compound, stereo and digital microscopes at a glance
| Microscope type | Best for | Typical strengths | Important limitation |
|---|---|---|---|
| Compound biological | Prepared slides, cells, tissues, microorganisms and thin transparent specimens | Higher optical magnification and transmitted lighting | Small working distance; unsuitable for most large, opaque objects |
| Stereo or dissection | Insects, leaves, flowers, rocks, coins, components and dissections | Three-dimensional view, generous working distance and easy specimen handling | Lower magnification than a compound microscope |
| USB or Wi-Fi digital pen-style | Electronics, surfaces, documents, group viewing and image capture | Portable, easy to share and records photos or video | Display magnification claims are not directly comparable with optical microscope magnification |
| Digital compound or stereo | Slides or solid objects plus classroom display and documentation | Combines optical viewing with image capture and sharing | Higher cost and software or device compatibility must be checked |
| Portable field microscope | Outdoor observations and introductory exploration | Lightweight, economical and easy to transport | Limited magnification and fewer controls |
Start with the specimen—not the magnification
Before comparing models, list what students will actually observe.
If the specimen is thin enough for light to pass through—such as a prepared plant section, cheek-cell slide or pond-water sample—a compound biological microscope is usually the correct starting point.
If the specimen is solid, thick or opaque—such as a beetle, leaf surface, mineral, coin or printed circuit board—a stereo microscope or reflected-light digital microscope will usually provide a more useful image.
Ask four questions:
- Is the specimen transparent, translucent or opaque?
- Does it need to remain intact while being viewed?
- Will students need room beneath the lens to manipulate it?
- Does the image need to be shared, photographed or projected?
These answers quickly narrow the choice.
What is a compound biological microscope?
A compound microscope uses an objective lens close to the specimen and an eyepiece near the viewer’s eye. The magnification of the objective and eyepiece combine to produce the total optical magnification.
For example, a 10x eyepiece used with a 40x objective produces 400x total magnification.
Compound microscopes normally shine transmitted light upwards through the specimen. This is why samples are prepared in a thin layer on a glass slide. They are well suited to:
- plant and animal cells;
- tissue sections;
- prepared biology slides;
- pond-water organisms;
- crystals and fine particles;
- bacteria when the optics, preparation and technique are suitable; and
- other transparent or translucent specimens.
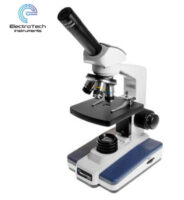
The Microscope Biological Monocular 40x–400x with LED Illumination is a practical entry-level biological model. It includes 4x, 10x and 40x objectives, coarse and fine focus, adjustable transmitted LED lighting and a pointer eyepiece.
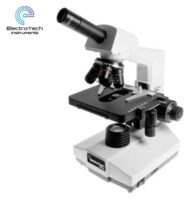
For a wider magnification range and mechanical stage, the Monocular Biological Microscope 40x–1000x includes four achromatic objectives, an X-Y mechanical stage and an Abbe condenser. Its highest objective uses immersion oil, so staff and students require appropriate preparation and cleaning procedures.
Monocular vs binocular microscopes
A monocular microscope has one eyepiece. A binocular microscope divides the optical image between two eyepieces.
Choose monocular when:
- budget is a major consideration;
- viewing sessions are relatively short;
- students are learning basic microscope operation;
- the instrument will be moved frequently between classrooms; or
- a larger number of individual stations is more valuable than binocular viewing.
The compact Monocular Biological Microscope with 4x, 10x and 40x objectives provides a straightforward three-objective configuration for general observations.
Choose binocular when:
- students or laboratory staff will observe for longer periods;
- comfortable viewing is a priority;
- the curriculum requires a more advanced mechanical stage and condenser; or
- the microscope will support senior biology or laboratory work.
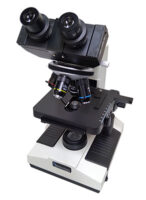
The Biological Binocular Microscope with Quad Objectives offers adjustable interpupillary distance, diopter correction, four objectives, an integrated X-Y stage, an Abbe condenser and LED illumination. These controls support precise positioning and more comfortable extended viewing.
Binocular does not automatically mean stereo. A binocular compound microscope presents the same flat microscope image to both eyes. A stereo microscope uses two optical paths to produce depth perception.
What is a stereo or dissection microscope?
A stereo microscope is designed for lower-magnification inspection of larger objects. It normally provides a three-dimensional view and enough working distance to rotate, sort or dissect the specimen beneath the lens.
Stereo microscopes are useful for:
- insects and other small animals;
- flowers, seeds and leaf surfaces;
- rocks, fossils and mineral samples;
- coins, stamps and textiles;
- jewellery and small manufactured parts;
- solder joints and printed circuit boards;
- dissections and specimen preparation; and
- tasks requiring hand tools beneath the lens.
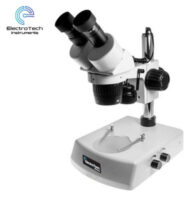
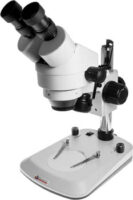
For more advanced work, the Stereo Dissection Microscope 20x–40x with LED Illumination provides 100 mm of working distance and both incident and transmitted lighting. Incident light illuminates an opaque specimen from above, while transmitted light passes upwards through a suitable specimen from below.
Its interchangeable frosted-glass and black-and-white stage plates help optimise contrast for different specimens. The replacement LED top lamp and black-and-white incident-light plate are available separately to support maintenance and continued use.
Compound vs stereo microscope: which one should a school buy?
| Classroom activity | Better starting choice | Why |
| Viewing onion cells | Compound biological microscope | Thin slide specimen viewed with transmitted light |
| Examining pond water | Compound biological microscope | Higher magnification for small transparent organisms |
| Identifying insect features | Stereo microscope | Preserves the intact specimen and shows depth |
| Comparing rock textures | Stereo microscope | Reflected light and generous working distance suit opaque samples |
| Inspecting solder joints | Stereo or digital microscope | Low magnification and room for tools are more useful than slide optics |
| Demonstrating a prepared slide to a class | Digital compound microscope | Captures or displays the compound microscope image |
| Recording surface details on a tablet | Wi-Fi digital microscope | Portable live viewing and image capture |
| Field exploration | Portable microscope | Lightweight and easy to distribute |
Schools teaching both slide biology and whole-object observation will generally benefit from having both compound and stereo microscopes. One type cannot fully replace the other because they solve different viewing problems.
What is a digital microscope?
“Digital microscope” describes several different product types.
USB and Wi-Fi pen-style microscopes
These compact microscopes use a camera and built-in LEDs to display an enlarged image on a computer, phone or tablet. They are convenient for group viewing, quick image capture and examining surfaces.
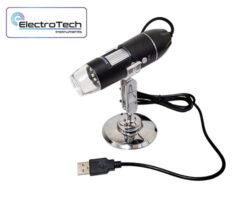
The USB Digital Microscope 2MP connects to a computer and includes eight adjustable LEDs and a rotating base. It is useful for general school or home inspection where a live digital image is more important than traditional eyepiece viewing.
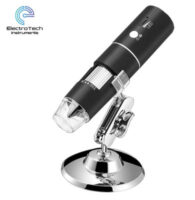
The Wi-Fi Digital Microscope 2MP can share a live image with compatible phones and tablets over Wi-Fi and also supports USB-connected computers. Its rechargeable battery and compact format suit portable demonstrations and field-style observations.
A steady stand can improve focus and repeatability. The USB Digital Microscope and Stand Bundle adds fine vertical adjustment and a swivelling arm, while the Wi-Fi Digital Microscope and Stand Bundle combines wireless viewing with an adjustable support.
Digital compound microscopes
A digital compound microscope combines slide-viewing optics with a camera. This is useful when teachers need to project an image, capture evidence or let several students discuss the same specimen.
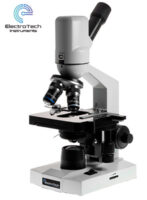
The Digital Microscope USB with 3MP Camera has four objectives, a mechanical stage, adjustable LED illumination and USB output. Compatibility requirements should be checked against the computers used by the school before purchase.
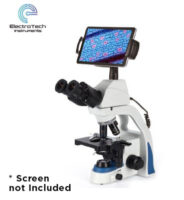
The Digital Wi-Fi Binocular Microscope 1000x combines binocular viewing with a built-in camera for capturing live images. It is suited to teaching demonstrations and more advanced laboratory applications.
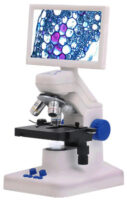
For screen-based viewing without requiring every student to use an eyepiece, the 8MP 7-inch LCD Biological Microscope adds a built-in display, photo and video recording, HDMI, USB and Wi-Fi connectivity, plus upper and lower LED illumination.
Digital stereo microscopes
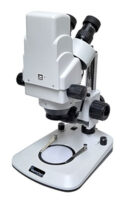
Digital stereo microscopes combine working distance and depth-oriented inspection with image capture. The Digital Zoom Stereo Microscope 5MP offers 7x–45x optical magnification, a 100 mm working distance and USB output. It suits advanced inspection, demonstration and documentation of solid specimens.
Optical magnification, digital magnification and useful detail
Large advertised magnification numbers can be misleading when models use different optical and digital systems.
Optical magnification enlarges the image through the lens system. Digital magnification enlarges the camera image after it has been captured. Digital enlargement can make an image appear bigger, but it cannot recover detail that the optics and sensor did not resolve.
When comparing microscopes, consider:
- objective quality;
- numerical aperture where relevant;
- illumination and contrast;
- focus control;
- mechanical stability;
- camera resolution;
- display size and resolution;
- field of view;
- working distance; and
- specimen preparation.
For classroom purchasing, the useful image at the required magnification matters more than the highest number printed in the specification.
Why lighting matters
Microscope illumination should match the specimen.
Transmitted light
Transmitted light travels through the specimen from below. It is essential for most prepared slides and thin biological samples.
Incident or reflected light
Incident light shines onto the specimen from above. It is used for opaque surfaces such as rocks, insects and electronic components.
Dual lighting
A model with upper and lower lights can handle a wider range of objects, but this does not automatically make it a substitute for both a compound and a stereo optical system. Lens design and working distance still determine how the microscope is best used.
Adjustable brightness is valuable because too much light can wash out detail while too little reduces contrast and makes focusing difficult.
Features worth comparing
Coarse and fine focus
Coarse focus moves quickly through a large range. Fine focus allows small adjustments at higher magnification. For biological work above introductory levels, fine focusing is highly valuable.
Mechanical stage
A mechanical stage moves the slide predictably along X and Y axes. It is easier to track a specimen and return to a feature than moving the slide by hand.
Condenser and diaphragm
The condenser directs light through the specimen, while the diaphragm controls the light cone. These controls can improve contrast and resolution when used correctly.
Working distance
Working distance is the space between the objective and specimen when focused. Stereo microscopes generally offer much more room for tools and intact objects than compound microscopes.
Rechargeable or battery operation
Portable power can be helpful for fieldwork, flexible classroom layouts and locations without a convenient power point.
Camera and connectivity
Before buying a digital model, check supported operating systems, connections, software, device permissions and whether the school network allows the intended Wi-Fi workflow.
Recommended microscope by user and application
Primary and junior-secondary exploration
For field trips or a low-cost whole-class activity, the Jiffyscope Portable 30x Microscope Kit includes a well slide, reusable slide, pipette and prepared sugar-and-salt slide. A pack of ten Jiffyscope kits can equip small groups.
General secondary biology
A 40x–400x monocular compound microscope provides a practical introduction to prepared slides and student-made specimens. Fine focus, adjustable illumination and a stable stand should be prioritised over extreme magnification claims.
Senior biology and laboratory work
Consider binocular viewing, a mechanical stage, condenser controls and a four-objective nosepiece. Digital imaging may be useful for assessment evidence and teacher demonstrations.
Electronics, geology and materials
Choose a stereo microscope or stand-mounted digital microscope with incident lighting and enough working distance for the object and tools.
Teacher demonstrations
A digital compound, stereo or LCD microscope allows one specimen to be discussed by the class. Select the optical format according to whether the specimen is a slide or solid object.
Essential microscope slides and accessories
A microscope purchase should include the consumables and storage needed to use it effectively.
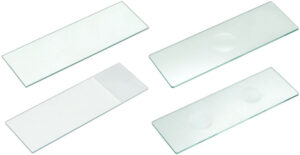
Premium glass microscope slides are available in standard, concave and frosted-end formats. Standard slides suit many routine samples, concave slides can help contain a liquid specimen, and frosted ends provide a writable labelling area.
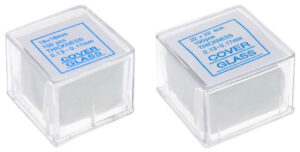
Glass microscope coverslips flatten and protect specimens while producing a more even optical layer. Coverslips are thin and fragile, so students should use suitable tools and supervision.
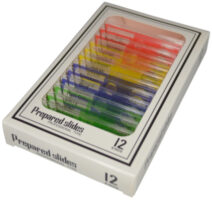
Ready-to-use sets such as the Prepared Biology Microscope Slides, Prepared Botany Microscope Slides and Prepared Plant Microscope Slides allow classes to begin observing consistent specimens without first mastering sectioning and staining.
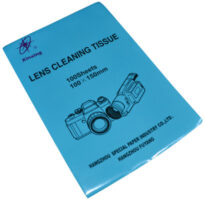
A microscope slide box protects and organises 25, 50 or 100 slides. Lens-cleaning paper provides an appropriate tissue for optical lenses when used with a suitable lens-cleaning solution.
Common microscope buying mistakes
Choosing by maximum magnification alone
More magnification does not guarantee more resolved detail. Match the optical system to the specimen and application.
Buying a compound microscope for solid objects
A coin, insect or circuit board may not fit beneath the objectives and cannot normally be viewed effectively with transmitted light. Choose stereo or reflected-light digital imaging.
Buying a stereo microscope for cells
Stereo magnification is ideal for whole objects but generally insufficient for detailed cellular observation. Choose a compound biological microscope for prepared slides.
Ignoring working distance
Students need space to position irregular objects or use forceps and probes. Check the specified working distance for stereo inspection tasks.
Overlooking computer compatibility
Digital microscopes may depend on particular operating systems, ports, software or apps. Check the current school devices before ordering.
Forgetting accessories and storage
Slides, coverslips, prepared specimens, cleaning materials and slide boxes determine whether the microscope can be used and maintained efficiently from the first lesson.
Microscope care in a school laboratory
- Carry a microscope with two hands—one supporting the base and one holding the arm or frame as directed by the manufacturer.
- Begin focusing with the lowest-power objective.
- Keep fingers away from optical surfaces.
- Use proper lens paper rather than paper towel or clothing.
- Remove immersion oil promptly using the recommended method.
- Lower the stage and select the lowest-power objective before storage where appropriate.
- Cover the instrument when not in use.
- Store slides dry and protected in a labelled box.
- Keep cords, batteries, chargers and digital accessories with the correct microscope.
- Inspect equipment before and after class so faults are identified early.
The right microscope makes the specimen easier to understand
There is no single microscope that is best for every school activity.
Choose a compound biological microscope for thin specimens and prepared slides. A stereo microscope for intact, three-dimensional and opaque objects. Choose digital imaging when the class needs to share, capture, measure or document what the microscope sees.
By starting with the specimen, lighting and teaching task, schools can select equipment that produces clearer observations, is easier for students to use and remains valuable across the curriculum.
Explore the complete Wiltronics range of microscopes and accessories, including biological, stereo, digital and portable microscopes, plus slides, lighting and storage equipment.
© Electrotech Brands Pty Ltd 2026
Write a Comment
You must be logged in to post a comment.