

Classroom Microscope Activities: Observe
October 12, 2026
Classroom Microscope Activities: Observe, Compare and Draw
Finding a specimen is only the beginning of a microscope lesson. The next step is helping students describe what they can see, compare structures and support their explanations with evidence.
For Term 4 practical work, a short sequence of microscope activities can build these skills without introducing slide preparation at the same time.
At Wiltronics, our prepared slides, microscope accessories and storage options help teachers organise lessons around observation. This guide starts with finding and focusing a specimen, then develops comparison and recording tasks.
Begin with one clearly visible specimen. Build confidence before increasing magnification or adding more complex identification tasks.
Choose the learning goal
Choose the outcome before selecting the slides.
| Learning goal | Suggested task | Evidence students produce |
|---|---|---|
| Develop focusing skills | Locate a teacher-selected specimen | A focused view checked by the teacher |
| Describe visible features | Observe one selected area | Three precise observations |
| Compare structures | Examine two prepared specimens | A comparison table |
| Record evidence | Draw a selected field or structure | A labelled observational drawing |
These are adaptable teaching ideas, not a prescribed sequence for every year level. Preview the specimens with your classroom microscopes and set expectations appropriate to students’ experience.
For help choosing an instrument, see our School Microscope Buying Guide. The activities below focus on prepared slides viewed with a compound biological microscope.
Select your specimens
Prepare a suitable microscope, selected slides and a recording sheet for each station.
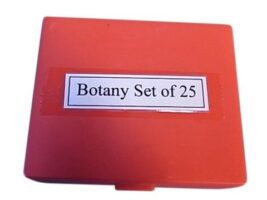
Our Prepared Botany Microscope Slides—Set of 25 includes monocot and dicot stem sections, leaf and root sections, Spirogyra and other preparations.
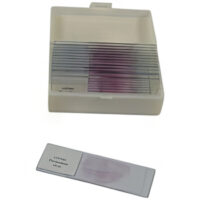
For broader comparisons, our Prepared Biology Microscope Slides—Set of 25 includes Spirogyra, onion root tips and several tissue preparations. Review the full contents before choosing specimens for your class.
Plan a slide rotation or provide duplicates for simultaneous observations. Give every student time at the eyepiece.
Activity 1: Find, focus and describe
Beginner focus: locating a specimen and describing visible features.
Start with a prepared slide you have already checked for clear, readily located features.
Demonstrate the controls on the actual microscope students will use. Begin with the lowest-power objective, position the specimen over the illumination and follow the instrument’s focusing instructions.
Once students find the specimen, ask them to centre an area of interest. When moving to higher-power objectives, use fine focus and maintain clearance between the objective and slide. If the specimen is lost, return to low power and locate it again.
Ask students to record three observations before naming structures. Useful prompts include:
- What shapes or repeating patterns can you see?
- How are the visible structures arranged?
- Which boundaries are clear, and which remain uncertain?
“I can see repeated compartments arranged in rows” gives the discussion a firmer starting point than an unsupported label.
Teaching prompt: “What can you point to in the specimen that supports your description?”
Activity 2: Compare two plant sections
Guided extension: comparing tissue arrangements for students with some background in plant structure.
Use the monocot and dicot stem cross-sections from the botany set. Preview both slides and provide a reference appropriate to the students’ prior knowledge.
Begin by asking students to describe the overall arrangement in each section. Introduce the relevant biological names after students have identified visible differences.
| Observation question | Specimen A | Specimen B |
|---|---|---|
| What is the overall shape of the section? | ||
| Which patterns or groups of structures stand out? | ||
| How are those groups arranged? | ||
| What is one similarity? | ||
| What is one difference? |
Use the same microscope settings where practical and record the magnification for each observation. Avoid treating apparent size differences as measurements unless students have a calibrated method.
For students not yet ready for tissue identification, simplify the task to describing visible shapes and patterns. Students can also move directly from the focusing activity to drawing the same specimen.
Activity 3: Turn observations into a scientific drawing
Ask students to draw a selected area from their own microscope view.
For this activity, require:
- A specimen title.
- Clear outlines showing the observed arrangement.
- Labels for features they can identify confidently.
- The total viewing magnification.
- One sentence explaining a visible feature.
For a conventional compound microscope, total viewing magnification is the eyepiece magnification multiplied by the objective magnification. A 10× eyepiece with a 10× objective gives 100× total magnification.
Record this as the viewing magnification; it does not establish the scale of the drawing.
Encourage students to leave an uncertain feature unlabelled and ask about it. Their drawing should record evidence from the slide rather than reproduce a remembered textbook image.
Extend to slide preparation when students are ready
Once students can locate, focus and record a prepared specimen, a separate lesson can introduce making slides using a teacher-approved method.
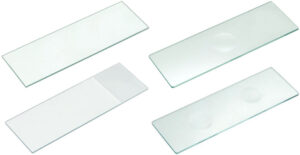
Our Premium Glass Microscope Slides—Pack of 50 includes standard, concave and frosted-end options. Select the format specified by your activity.
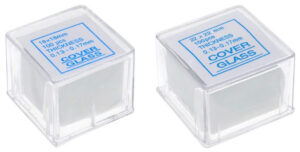
Our Glass Microscope Coverslips come in boxes of 100, with 18mm and 22mm square options. Check the required size and suitability for the microscope and specimen.
Calculate consumables separately from reusable equipment. Ten stations preparing two new slides each require 20 slides, before allowing for repeat attempts or breakage.
Follow your school’s procedures for glass handling, specimen preparation and any stains used.
Troubleshoot before changing the specimen
| Problem | First checks |
|---|---|
| No useful image appears | Illumination, objective engagement and specimen position |
| The specimen disappears at higher power | Return to low power, find it and centre the area of interest |
| The image remains unclear | Fine focus, slide orientation and cleanliness |
| Students report different features | Whether they are viewing the same region at the same magnification |
| A student cannot explain a label | Ask them to point out the feature and describe the evidence |
Use lens-cleaning materials and methods recommended by the microscope manufacturer. Avoid wiping optical surfaces with clothing or paper towel.
Check understanding before packing away
Ask each student for one observation supported by their drawing and one question they would investigate next. Students completing the comparison activity should also explain one difference between the specimens.
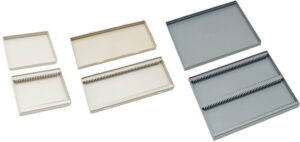
Keep slides organised in their cases or our Microscope Slide Boxes, available in 25-, 50- and 100-slide capacities.
Frequently asked questions
Are prepared slides useful for beginner microscope lessons?
Yes. They let students practise observation and focusing before taking on specimen preparation. Choose slides you have previewed and can use to demonstrate clear features.
Should students begin at the highest magnification?
No. Begin with the lowest-power objective to locate and centre the specimen, then increase magnification when the task requires it.
Can one slide set support a whole class?
It can support a planned rotation. Check how many copies of each specimen are available if groups need to perform the same observation simultaneously.
Do we need blank slides and coverslips for these activities?
The first three activities use prepared slides. Blank slides and coverslips become relevant when students begin preparing their own specimens.
What should students do when they cannot identify a structure?
Describe and draw what is visible, then compare it with an appropriate reference or ask the teacher. An uncertain identification is a useful discussion point.
Prepare your next microscopy lesson with Wiltronics
Explore our microscopes and accessories and microscope slides and equipment to prepare your classroom stations.
Start with a focused question, choose specimens that support it and give students time to observe, compare and explain.
© Electrotech Brands Pty Ltd 2026
Write a Comment
You must be logged in to post a comment.