What Is a Light Meter and How Is It Used in Photography
March 9, 2022
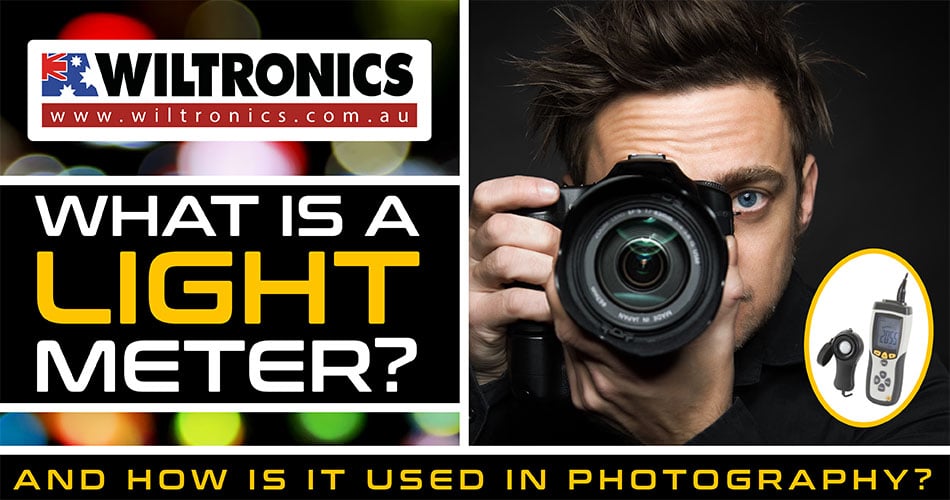
Anyone involved in photography should know how essential a light meter is. But what is this device all about?
When it comes to photography, there is more than just picking up the camera and capturing the moment. Lighting, spacing, and angle are a few points for consideration.
Also the right equipment is needed to capture the perfect image. This is especially true if you are shooting in a studio.
One of these must-have elements is the light measuring device called a light meter. How it works and why it is necessary for the field is what this guide is for.
Read on and find out why these handheld light metering tools are still used today.
What Is a Light Meter?
A light meter is a handheld device used for measuring light. Light metering, on the other hand, is the process of measuring the light of a scene before taking a picture. Simply put, it is a technique that is done using a light meter.
Also known as exposure meters, light meters can read the ambient light in a scene. Even better, the direct light from the source. Some units can also calculate the correct shutter speed and aperture to capture an accurate exposure.
Moreover, they work by detecting the amount of light striking the sensor or the subject. These handy devices also allow you to adjust the aperture, shutter speed and ISO to get the optimal exposure.
Most cameras have built-in light meters and metering modes to calculate exposure settings. But the handheld version is extremely important and often comes in handy, especially in cases such as:
- Shooting with older photography equipment.
- Scouting a location before shooting to plan what lighting equipment will be needed.
- Finding which aspects of a scene or subject is the most illuminated.
Suppose there are drastic changes in light intensity within the scene. Choosing the right light metering mode will differentiate between a properly exposed subject and a poor photograph.
The Role Light Meters Play in Photography
Generally, light meters help photographers capture the perfect image tone. These devices signal the user if part of an image is overexposed or underexposed.
Further, there are specific types of photography where light meters are particularly useful. This includes landscape and portrait photography, which we will explain further later.
Types
There are two different kinds of light meters:
- Incident
- Reflective
1. Incident
Handheld incident light meters measure the amount of light hitting a subject directly. This is done by placing the meter close to the target. The white circular zone or lumisphere is where lighting is collected for measurement.
Simply put, an incident light meter measures light before it reflects off of the focus. Thus, you can get a slightly more accurate measurement of the total illumination in the area
When reading an exposure meter, the device will display the aperture, shutter speed, and ISO settings needed. This helps you get optimal exposure for a given scene.
2. Reflective
Reflective light meters measure available light by judging exposure based on light reflected from the subject. Cameras with built-in light meters use this type of light meter, such as modern digital models.
Reflective light metering is usually accurate enough. Yet there are times when the light meter gets confused by sudden shifts in light. For instance, the light off of the white dress of a bride only to find that the groom’s dark suit is underexposed.
Landscape photography
Incident light meters are ideal in landscape photography. As long as the light is steady throughout the scene, you only need to take one measurement.
Simply hold the light meter out in front of you and record the calculations. Things change a bit when discussing reflective light meters.
Tip: To get a read of the reflected light in a landscape photo, measure three points of the shot. This includes the darkest, brightest, and middle tones. Then, take their average recording.
Portrait photography
As mentioned, light meters are valuable when taking portraits. If using an incident light meter, hold it towards the subject right near the light source.
You have more freedom with portrait photography with light meters, unlike landscape. For one, you could simply adjust the device higher than what the reading suggested.
As for using reflective light meters, it requires three spots: darkest, brightest, and middle tone. But do not limit your creativity on this one. If you want your image to be a little darker, adjust your settings to mimic the darkest measurement.
How To Meter In-Camera?
Each setting informs your camera on what is most important within the frame. There are three major ways your camera can meter. By knowing these, it will help you understand how to use a light meter.
Note: Different camera brands like Nikon and Canon have unique light metering terms. We advise you to consult your user manual and camera menus to determine which metering mode will be best for each occasion.
1. Matrix or evaluative metering
You will use this metering when you want to optimise good exposure for the entire scene. The camera breaks up the scene into sections and averages the exposure settings. This ensures the highlights and shadows are well balanced.
Matrix is also the most popular light metering as it can be used for nearly any scene or subject. Be it in landscape photography or other genres that use the entire frame; you can rely on this one.
2. Centre-weighted metering
When using this metering, the camera places the most importance on the centre for light metering. The corners of the frames are not used for exposure metering. This makes centre-weighted ideal for portraits photography.
3. Spot metering
This is where the system measures light using a single focus point instead of sections of the image frame. Spot metering is used when a single element within the frame is important or with backlit subjects.
Where is the light meter on a camera?
You can view it along the base of the unit’s viewfinder, optical viewfinder, or LCD. A simple line with sections and a -/+ axis makes up the entirety of the built-in light meter display.
A negative exposure value (EV) from the gauge signals the camera light meter senses the resulting image will be underexposed or vice versa. Aim for as close to the centre of the axis or 0 as possible.
Find The Best Light Meter Here
Wiltronics stocks high quality light meteres for the lighting technician and photograhper alike! Please be aware these are not photography specific light meters, and will not provide aperture, shutter speed, and ISO settings recommendations.
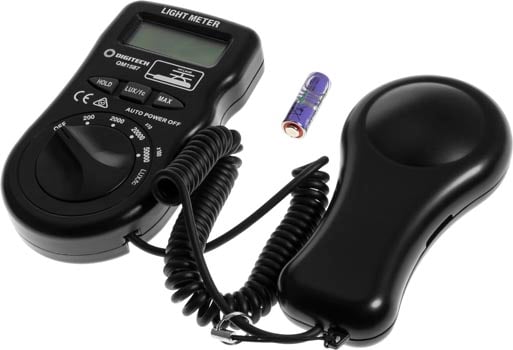
Digital Light Lux Meter
Product code: ME5586
Easily measure light levels with this Digital Light Lux Meter! Designed to be user friendly, this powerful device allows you to measure light intensity 0 to 50,000 lux.
Even better, it features an easy to read display screen and has a small compact design. The unit also comes with a carry case, battery and instructions.
You can use the device in a range of areas, and it is a great way to measure and find light inefficiencies in your office or home.
Perfect for beginners and professional photographers alike! Other features include:
- Auto power off
- Max hold and data hold
- 3 ½ digit LCD with LUX, FC, LOBAL, MAX, HOLD indication
- Accurately display light level in terms of Foot Candles (Fc) or Lux over a wide range
- Easy to use, pocket-size and lightweight
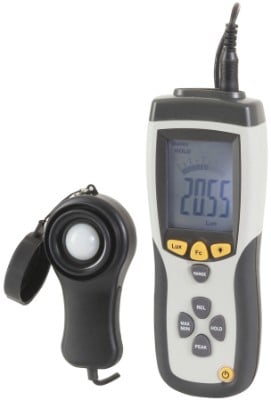
400K Lux Light Meter Pro with Carry Case
Product code: JQM1584
This professional 400K lux light meter is an easy-to-use, light intensity (lux) meter. Ideal for measuring, comparing, and adjusting lighting levels in your environment.
It is overflowing with features that any lighting technician should have. It uses photopic spectral sensitivity that closely mimics the human eye’s response to changes in light.
Remarkably accurate with a rapid response and can store min and max values for easy comparisons. Measurement can be switched between LUX and FC (foot-candles).
The data hold function can pause the reading. The unit also comes with a carry plastic case with a handle for easy and safe transportation.
Other features include:
- Relative mode
- Auto zeroing
- Long-life silicon photodiode sensor
- Auto power off: 30 minutes
- Compatible with LED lighting
- Max and min measurements
- Easy to read backlit display
- Accuracy for C.I.E. standard illuminance A(2856K)
The Bottom Line
Whether you are an experienced photographer or just starting out, it is crucial that you know what tools you need to capture the perfect image. It is your responsibility to understand how they are used and their role in the field.
The importance of light metering lies in getting the right exposure on the camera. Proper exposure forms the basis for capturing the perfect image outcome. It comes with complete information in the highlights and shadows and with the maximum colour detail.
If you know how to use a light meter, you can maximise the image quality. You will also save time in post-processing as there will be less adjustments in the settings.
And we hope this guide will give you the knowledge you need about ‘light meters for photography’. Most importantly, help you close this chapter on understanding light meters.
Remember, to fully understand how to use a light meter, you should be familiar with the different types. May you also find the best model for your capturing needs!
© Electrotech Brands Pty Ltd 2022
Write a Comment
You must be logged in to post a comment.