

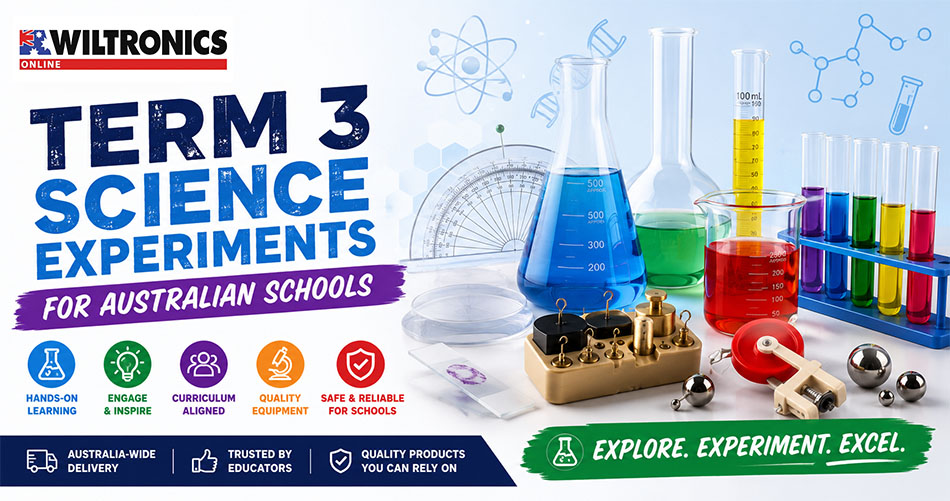
Term 3 Science Experiments for Australian Schools
July 14, 2026
Term 3 Science Experiments for Australian Schools
Term 3 gives science classes time to move beyond short demonstrations and complete more substantial investigations.
Victorian government schools begin Term 3 on Monday 13 July 2026, with the term finishing on Friday 18 September 2026. This ten-week period is well suited to investigations involving planning, repeated measurements, data analysis and student evaluation.
Practical science helps students connect scientific ideas with evidence they can observe and measure. Rather than simply following instructions, students can ask questions, form predictions, control variables and evaluate the reliability of their results.
Wiltronics supplies a broad range of science equipment for schools, covering biology, chemistry, microscopy, physics, laboratory equipment and safety supplies.
Choosing a Term 3 science investigation
The right activity will depend on the students’ experience, the available lesson time and the practical skills being assessed.
| Investigation pathway | Core skills | Suggested project |
|---|---|---|
| Microscopy | Observation, biological drawing and comparison | Compare plant and animal structures |
| Chemistry measurement | Volume, accuracy, precision and repeatability | Test different liquid-measuring tools |
| Forces and motion | Variables, measurement and mechanical advantage | Design an efficient pulley system |
| Light and optics | Reflection, refraction and angle measurement | Map the path of a light ray |
Each investigation can begin as a guided classroom activity and develop into a more independent student project.
1. Compare cells and tissues with microscopy
Microscopy allows students to observe biological structures that cannot be seen clearly with the unaided eye.
Students can practise carrying and setting up a microscope, adjusting illumination, starting with low magnification and producing labelled scientific drawings.
The Wiltronics microscope and microscopy accessory range includes biological microscopes, stereo microscopes, slides and supporting equipment for schools and laboratories.
Suggested equipment
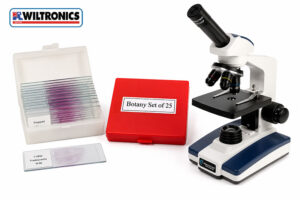
- The 40x–400x biological monocular microscope includes adjustable LED illumination with coarse and fine focus controls.
- The prepared biology microscope slide set contains 25 mounted biological specimens.
- The prepared botany microscope slide set provides 25 labelled plant specimens covering cells, tissues, stems, leaves and reproductive structures.
These products support ready-to-use classroom observations without requiring every specimen to be collected and prepared during the lesson.
Term 3 experiment: What features distinguish biological specimens?
Provide each student group with several prepared slides. Include examples from plants, animals or microorganisms where suitable.
Students record:
- the specimen name
- the magnification used
- visible structures
- similarities and differences
- a labelled scientific drawing
- an evidence-based identification
Students should first locate the specimen using low magnification. Once it is centred and focused, they can increase the magnification to examine finer details.
Developing the investigation
Begin with a teacher-selected pair of slides. Students can then choose additional specimens and create their own comparison question.
Possible questions include:
- How do plant tissues differ from animal tissues?
- Which visible structures appear in more than one specimen?
- How does increasing magnification affect the visible field of view?
- Can an unknown specimen be classified using observable features?
Extension students could develop a classification key that allows another group to identify the specimens.
For more microscope planning advice, see Choosing the Right Microscope by Classroom Year Level and Modern Biology Classroom Microscopes for 2026.
2. Investigate accuracy and precision in chemistry
Before students complete complex chemistry experiments, they need to understand how equipment choice affects measurement quality.
A beaker, measuring cylinder and volumetric flask can all contain liquid, but they are not designed to perform exactly the same task. Asking students to compare them creates an investigation focused on accuracy, precision and repeatability.
Explore the broader range of chemistry glassware and plasticware for beakers, cylinders, flasks, pipettes, test tubes and other laboratory vessels.
Suggested equipment
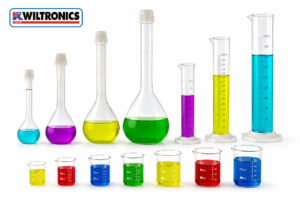
- Polypropylene graduated measuring cylinders provide visible graduations, pouring spouts and stable bases.
- Borosilicate glass beakers are available in multiple capacities for holding, mixing and general laboratory work.
- A polypropylene volumetric flask with cap provides a defined graduation mark for preparing a set liquid volume.
Wiltronics offers these vessels in different capacities and materials, allowing teachers to select equipment appropriate to the activity and classroom environment.
Term 3 experiment: Which measuring tool is most reliable?
Give each group a target liquid volume and several different measuring vessels.
Students should:
- select a vessel
- measure the target volume
- transfer the liquid to a checking vessel
- record the result
- repeat the process several times
- compare the variation between attempts
- evaluate which equipment was most suitable
Water or another school-approved liquid can be used for the investigation.
Students should read the liquid level at eye height and use the same technique for every trial. They can then discuss how graduations, vessel shape and viewing position affect the measurement.
Questions for evaluation
Ask students to distinguish between two ideas:
- Accuracy: How close was the result to the intended value?
- Precision: How similar were the repeated measurements?
A group may achieve similar results every time without being close to the target. This creates a useful discussion about why repeatable measurements are not automatically accurate.
Extension students can calculate an average result, determine the range and graph the variation produced by each vessel.
For more information about everyday laboratory items, read the Wiltronics guide to laboratory consumables and their uses.
3. Explore forces with a pulley investigation
Forces and motion experiments provide immediate, visible results while still allowing students to collect numerical evidence.
The Wiltronics physics equipment range includes resources for motion, forces, mass, light, electricity, magnetism, thermodynamics and sound.
Suggested equipment
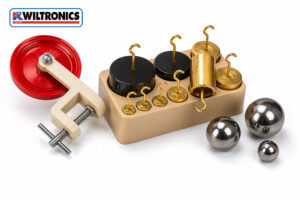
- The 70mm adjustable pulley on clamp attaches to a bench or table for mechanical advantage and rope-tension activities.
- The double-hooked weight calibration set provides a selection of loads for force investigations.
- The IEC steel ball set includes three ball sizes for rolling, collision and free-fall activities.
These items support practical investigations involving applied loads, mechanical advantage, collisions and movement.
Term 3 experiment: Can a pulley reduce the required effort?
Give each student team the same load and ask them to design a pulley arrangement that makes it easier to lift.
Students should:
- draw the proposed system
- predict how it will affect the effort required
- construct the arrangement
- test the system
- record the effort and lifting distance
- modify one feature
- repeat the test
- explain the result
The class can compare systems containing different numbers or arrangements of pulleys.
The investigation should consider more than whether the load can be lifted. Students should also examine how far the rope must move and whether reducing the required force creates another trade-off.
Alternative activity: Rolling and collisions
The IEC steel balls can also support investigations involving ball size, release height, travel distance and collisions.
Students might investigate:
- how release height affects travel distance
- whether ball size changes collision behaviour
- how surface material affects movement
- whether repeated trials produce similar results
Only one independent variable should be deliberately changed at a time.
For additional classroom ideas, visit Top Physics Demonstration Tools That Wow Every Class.
Preparing a science order for Term 3? Contact the Wiltronics team to discuss classroom quantities, practical requirements and suitable equipment.
4. Map reflection and refraction with optics
Light experiments make concepts such as reflection, refraction, colour and image formation visible.
Purpose-designed optics equipment can help students produce clearer light paths and repeat measurements more consistently.
The Wiltronics light and optics equipment range includes light boxes, lenses, mirrors, prisms, refraction tanks, diffraction equipment and optical benches.
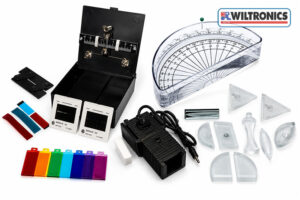
Suggested equipment
- The IEC Hodson Light Box and Optical Set supports foundational experiments involving ray optics and colour blending.
- The refraction tank with printed angles helps students observe light passing through a liquid.
- The IEC diffraction kit with slits and filters supports investigations involving slit width, filters and diffraction patterns.
The current optics range includes equipment for introductory ray tracing as well as more advanced diffraction and image-formation work.
Term 3 experiment: How does light change direction?
Students can use a light box, ray source or other approved equipment to investigate reflection or refraction.
Ask them to:
- trace the incident ray
- draw the normal line
- measure the angle of incidence
- measure the reflected or refracted angle
- repeat the investigation at several angles
- compare results between groups
- identify measurement limitations
For a refraction activity, students can compare the path of light before, during and after it enters another transparent material.
For a reflection activity, they can determine whether the measured angle of reflection is consistent with their prediction.
Extension ideas
More experienced students could:
- compare different transparent materials
- investigate curved and flat optical surfaces
- explore total internal reflection
- compare results with a mathematical model
- examine how slit width affects a diffraction pattern
Bright-light and laser activities must follow school procedures and be completed under appropriate supervision. Light sources should never be directed towards a person’s eyes.
Turn an activity into a fair scientific investigation
The equipment does not create the investigation by itself. Students also need a clear process for collecting and evaluating evidence.
A strong investigation should include:
A focused question
The question should identify what will be changed and what will be measured.
For example:
How does the number of supporting pulley sections affect the effort needed to lift a fixed load?
A testable prediction
Students should explain what they expect to happen and why.
The prediction does not need to be correct. It needs to be connected to scientific reasoning.
Clearly identified variables
Students should identify:
- the independent variable they will change
- the dependent variable they will observe or measure
- the controlled variables they will keep consistent
Repeated measurements
Repeating measurements helps students identify variation and determine whether their results are reasonably consistent.
The number of repeats should suit the activity rather than being selected without explanation.
Evidence-based evaluation
A useful evaluation explains:
- what pattern appeared in the results
- whether the evidence supported the prediction
- where uncertainty may have entered the method
- which improvement would have the greatest effect
- what could be investigated next
Students should avoid simply writing that “human error” affected the experiment. They should identify the specific measurement, setup or procedure that may have influenced the result.
Differentiating science investigations
The same practical activity can support different levels of independence.
Foundation level
Provide the method, equipment list and results table.
Students focus on safe equipment use, accurate observations and identifying a simple pattern.
Intermediate level
Provide the investigation question and available equipment, but ask students to develop part of the method.
Students identify variables, repeat measurements and evaluate reliability.
Extension level
Ask students to design the investigation and justify their equipment choices.
Students can calculate averages, graph results, analyse uncertainty or propose a follow-up experiment.
Term 3 laboratory preparation and safety
Science safety should be part of every investigation rather than a separate reminder delivered after the equipment has been distributed.
Before the lesson, teachers should review the procedure, assess the hazards and confirm that the required controls are available. School policies, current safety information and relevant safety data sheets should guide the activity.
Wiltronics offers science laboratory safety equipment including laboratory coats, gloves, hand protection and safety glasses. The junior science safety glasses provide an eye-protection option designed for younger users.
Before practical work begins, check that the laboratory has:
- clean laboratory equipment
- suitable laboratory hardware and consumables
- working balances and scales
- appropriate laboratory thermometers
Run a teacher trial before the student lesson. A trial can identify missing parts, unstable equipment, unclear instructions and unrealistic timing.
The School Science Lab Restocking Checklist for a New Term provides a useful starting point for checking shared practical spaces.
Frequently asked questions
What is a good science experiment for the beginning of Term 3?
Choose an activity that reviews practical skills and produces an observable result within one lesson.
Microscope comparisons, liquid-measurement challenges, pulley investigations and introductory optics activities can all begin simply and develop into longer projects.
How can teachers reduce practical setup time?
Store equipment in labelled class sets and prepare one checklist for each workstation.
Numbered trays make missing items easier to identify and allow the same equipment arrangement to be recreated across multiple classes.
How many times should students repeat a measurement?
The appropriate number depends on the investigation and the expected variation.
Students should complete enough trials to identify whether the result is consistent and explain why repeated measurements improve confidence in their conclusion.
Can science equipment be shared between students?
Many investigations work effectively in pairs or small groups, provided every student has a meaningful role.
Responsibilities can include setting up equipment, making measurements, recording observations, checking variables and evaluating the method.
What laboratory safety equipment does a school need?
The requirements depend on the activity and its risk assessment.
Common controls may include suitable eye protection, protective clothing, gloves, heat protection and clear laboratory procedures. Personal protective equipment should be selected for the specific task and used alongside other risk controls.
Plan practical Term 3 science experiments
The most effective Term 3 science experiments give students time to observe, measure, question, repeat and improve.
Whether a class is comparing biological specimens, measuring liquid volumes, constructing a pulley system or investigating the path of light, practical science helps students connect evidence with scientific explanations.
Explore the complete range of biology, chemistry, physics and laboratory science equipment or contact Wiltronics to discuss equipment for your Term 3 science program.
For broader laboratory planning, read the Complete Australian School Science Lab Guide.
© Electrotech Brands Pty Ltd 2026
Write a Comment
You must be logged in to post a comment.