

Choose an Infrared Thermometer for Your Workshop
September 14, 2026
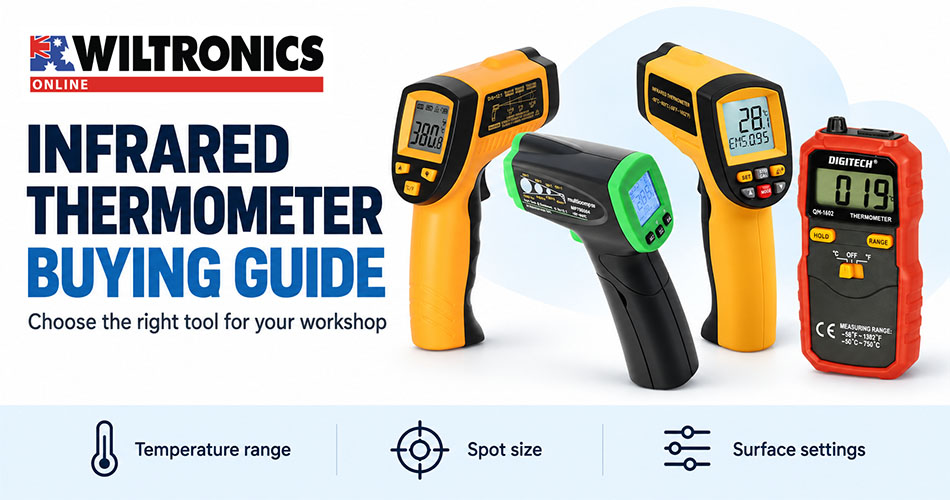
Choose an Infrared Thermometer for Your Workshop
You aim at a component, pull the trigger and get a temperature reading. But does that number describe the surface you intended to measure?
A small target, a shiny finish or the wrong setting can make an infrared reading misleading. Choosing the right thermometer starts with understanding the job: the expected temperature, target size, working distance and surface material.
This infrared thermometer buying guide explains those decisions and compares four Wiltronics options, including a contact thermometer for jobs that need a probe.
Quick choice: which thermometer should you consider?
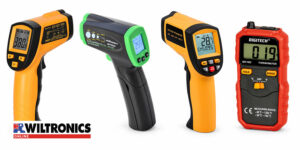
| Product | Listed measurement range | Features to compare | Main consideration |
|---|---|---|---|
| ME3029A infrared thermometer | −50 to 380°C | 12:1 distance-to-spot ratio; 0.95 default emissivity | General surface checks within its range |
| ME3028 digital infrared thermometer | −32 to 400°C | Adjustable emissivity; upper/lower temperature alarms; maximum/minimum display | Checks that benefit from temperature alarms |
| Benetech GM900 / ME3037 | −50 to 900°C | 12:1 distance-to-spot ratio; emissivity adjustable from 0.1 to 1.00 | Higher-temperature surface measurements |
| ME2002 K-type thermometer | Meter: −50 to 750°C | Contact measurement; accepts standard K-type thermocouples | Contact measurement; additional probe required for 750°C |
Use the table to shortlist a measurement method, then check the practical limitations below.
1. Understand what the instrument measures
An infrared thermometer measures surface temperature. A reading from a casing describes that surface; it does not establish the temperature of the components inside.
The aiming laser also needs careful interpretation. It helps you point the instrument, but the detector collects energy from a wider area. The visible dot is not the full measurement footprint. ThermoWorks explains laser targeting and measurement areas.
2. Match the measuring spot to the target
Distance-to-spot ratio describes the relationship between working distance and the nominal measurement diameter. With a 12:1 ratio, dividing distance by 12 gives an illustrative spot size.
| Distance from target | Illustrative spot diameter at 12:1 |
|---|---|
| 300mm | 25mm |
| 600mm | 50mm |
| 1,200mm | 100mm |
These figures are ratio calculations, not a substitute for the model’s optical diagram, minimum spot size or specified working distances. Keep the target larger than the measurement footprint; otherwise the surrounding area can affect the result. Fluke’s measurement guidance.
Consider a 20mm target measured from 600mm away. The illustrative 50mm footprint is wider than the target. A clear laser dot on the component does not resolve that mismatch.
3. Account for the surface finish
Emissivity describes how effectively a surface emits thermal radiation. Adjustable emissivity lets the instrument account for different surfaces, but the setting must suit the material being measured.
Shiny metal is a common problem. Polished surfaces have low emissivity and can produce misleading readings. Fluke suggests a suitable non-reflective patch or a correctly matched emissivity setting. Any tape or coating must be compatible with the surface and rated for its temperature; ordinary tape is not a universal solution for hot machinery.
Specify the actual finish—painted, oxidised or polished—when asking about suitability. If a reliable infrared method is impractical, consider an appropriate contact probe.
4. Separate range, resolution and accuracy
These specifications answer different questions:
- Range: Does the instrument cover the temperature you expect?
- Resolution: What is the smallest displayed increment?
- Accuracy: What error limits apply under the stated conditions?
For example, ME3029A lists 0.1°C resolution and a separate 1.5°C accuracy figure. Those are not interchangeable. A display showing tenths of a degree does not establish accuracy to a tenth. ME3029A specifications.
Before using a reading to accept or reject a part, obtain the full accuracy conditions for the temperature you will measure. A short product-page figure may not explain every range-dependent limit or test condition.
For your purchasing brief, complete this sentence: “I need to distinguish between ___°C and ___°C.” That gives you a more useful requirement than simply asking for a digital display.
5. Match the features to your work
ME3029A: for everyday surface checks
The ME3029A infrared thermometer combines a −50 to 380°C range with a 12:1 spot ratio. Wiltronics lists emissivity as 0.95 default, so do not assume adjustment is available without checking the instructions. Its 9V battery is not included.
Choose this option when you need straightforward readings and its range, optics and surface settings match the job.
ME3028: for temperature alarms and comparison checks
The ME3028 digital infrared thermometer adds adjustable emissivity, upper and lower temperature alarms, and maximum/minimum display functions.
These features may help when checking a series of targets against a chosen threshold. The product page does not state its distance-to-spot ratio, so confirm that specification before selecting it for small or distant targets. An alarm setting should reflect your equipment’s requirements, rather than an arbitrary temperature.
Benetech GM900: for measurements above 400°C
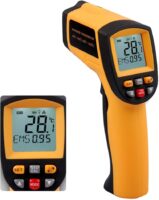
The Benetech GM900 extends measurement to 900°C and provides adjustable emissivity from 0.1 to 1.00.
Shortlist it when the other infrared models’ temperature ceilings are too low. Its listed optics remain 12:1, so check target size and working distance even when the temperature range is suitable.
ME2002: for jobs that need a contact probe
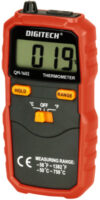
The ME2002 digital thermometer with K-type thermocouple offers a contact-based alternative. The meter accepts standard K-type thermocouples and has a listed −50 to 750°C range.
Wiltronics specifies that reaching 750°C requires an additional thermocouple probe. Match the probe’s construction, temperature rating and intended application to the measurement; the meter’s range does not establish the supplied probe’s capabilities.
6. Make repeat checks useful
Build a simple measurement record for your workshop. Include the target location, surface finish, working distance, emissivity setting, reading and operating condition. Add the date and any change made since the previous check.
For example, if you want to compare a housing before and after maintenance, plan both measurements at the same location and comparable operating conditions. Decide in advance what difference would warrant further investigation. A temperature observation is most useful when it answers a defined question.
Keep the optical path clear. Dust, steam and smoke can interfere with readings, while a dirty lens or a rapid change in ambient temperature can also affect results. Follow the instrument’s cleaning and acclimatisation instructions.
Frequently asked questions
Can an infrared thermometer measure through glass?
Do not use a reading through ordinary glass to establish the temperature of an object behind it. Glass can interfere with the infrared measurement even though you can see the target clearly. Use a suitable direct measurement method.
Can I measure shiny metal?
Shiny surfaces require care because their emissivity and reflections can affect the reading. Establish a suitable surface setting or measurement method; adjustable emissivity alone does not guarantee a correct result.
Does a higher temperature range mean better accuracy?
No. Range tells you which temperatures the instrument covers. Compare accuracy separately at your working temperature, and check the optics for your target size. A higher maximum rating is not an accuracy ranking.
Compare Infrared Thermometers at Wiltronics
Equip your workshop with a thermometer that suits the measurements you actually make. Start with the target and working conditions, then choose the range and functions that support your routine.
© Electrotech Brands Pty Ltd 2026
Write a Comment
You must be logged in to post a comment.