How To Use a Crimping Tool: A Beginner’s Guide
January 18, 2022
How to use a crimping tool? How does it work?
Crimping tools are great for joining pieces of metal, wires and other components. One of the common uses is the attachment of connectors to the end of electrical cables.
No wonder why many technicians and DIY enthusiasts favour a crimping tool! Further, it is multi-functional, making it a must-have hand tool.
As amazing as it may sound, the crimping process can be tricky as it consists of a few steps. That is why our team has decided to put together this short guide on how to use a crimping tool.
You would never know how important all the information we have for you is until you read it!
What Is a Crimping Tool
Crimp tools are used to join components by pressing them together and deforming one of them. The deformed piece is a crimp.
The purpose of a crimping tool is to prepare a network or cable for use.
An example of crimping is adjoining a connector to the end of a cable. RJ-11 and RJ-45 connectors are common connectors used for cables. Moreover, they can be attached to the end of a cable with just a crimping tool.
Most types of crimping tools are great for multipurpose uses. They come with compression, bending, cutting, stripping, and more.
Plus, they can work with different cable, wire or pipe sizes, including gauges. Despite a variety of different crimping tools, they are all used for the same purpose.
Take note, though, that using the wrong tool can cause damage. Using hammers or flat rocks to attach the connectors to the cables can result in bad quality or failure.
How to Use a Crimping Tool
The basic process for using a crimping tool is below. There may be additional steps depending on the type of connector you are crimping. For instance, crimping a RJ45 connector will require the coloured wires to be lined up in a specific order.
Use a wire stripper to remove a section of insulation at the end of the wire.
Place the wire you want to crimp into the connector. You want the bare wires to reach the end of the connector, and the wire insulation to match the connector base. Remove the cable from the connector and trim the wires to match.
Once matched, put the cable back into the connector and place them into the crimping tool. Then, squeeze the handles of the tool together to connect the wire and connector firmly.
Apply pressure to take out the newly crimped connector. To check if your connection is secure or not, give a few tugs.
The cable and the connector should hold together, even with a great force pulling them. If the connection is pulled apart, the crimping has not been done right.
Tip: Before installation, test your crimped cable. This helps to prevent failures once the cable and connector are installed, or additional work removing the wire from a complex setup.
Uses of Crimping Tool: Metalwork
The crimping tool is also widely used in metalworking. It plays an important role in many applications, including:
- Correcting bullets
- Electrical connections
- Securing lids on metal food cans
Moreover, it is utilised for bonding a non-metallic component with the workpiece. For instance, when joining segments of tubular smoke pipes for wood stoves. The joint will not be liquid-tight but may be arranged to prevent dirt buildup.
Crimp Tool Categories
There are various categories of crimp tools available. For smaller crimping requirements, precision is key.
Further, a manually-operated crimp tool will most likely be sufficient. But when more power is required, hydraulic and electrical models come in handy.
Handheld
As the name suggests, this category of crimping tool is manually operated. Handheld crimp tools are portable and ideal for smaller items.
They resemble traditional pliers with clamps bearing a ridge on one side and a notch on the other.
Electrical
Battery operated units require less effort when it comes to crimping pressure. Electrical crimping tools bring extra battery power to portable models.
Other units are also available to meet varying requirements. Some even come with ratchets and ergonomic fittings. The ratchet improves the efficiency significantly by ensuring that enough pressure is applied.
Benchtop
Bulkier models that are mounted on workbenches with higher capacity variations. A benchtop crimping tool is best for accomplishing more demanding crimping tasks.
Hydraulic
A category of crimping tools that demands less effort to operate. All thanks to the supplied compression power. Hydraulic crimp tools deliver maximum power for strenuous repair, maintenance and industrial applications.
Pneumatic
Compressed air-based tools deliver power for heavy-duty applications. Thus, they can bring serious force to crimping tasks.
Like hydraulics, pneumatic models use air pressure for the same purpose. They are also available in both manual and workbench models.
Different Types of Crimping Tool
Here are a few types of crimp tools, ideal for a range of industries and environments.
1. Bootlace crimp tools
A type of crimping tool designed to work with bootlace ferrules. These are copper tubes used for creating a reliable electrical connection. They need a different form of crimping to standard cabling—and the bootlace crimp tool does the job. Most bootlace crimping tools are electrically insulated and feature ratchets.
2. Auto electrical crimp tools
Designed to provide sturdy joins for electrical connectors and cables within car engines. These include non-insulated, pre-insulated, battery and ignition terminals. Different tools are available for each, all in standard plier designs.
3. Mini crimping tools
Ideal for use with thinner wiring widths. Using mini crimping tools for tasks requiring close-up precision and flexibility within tight operating spaces.
You can also find models that feature rotatable flip-top heads. These are of great use within confined areas.
Have a look at this compact, lightweight and rugged design mini crimp tool.
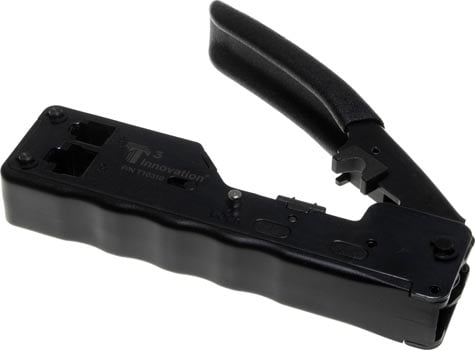
Crimping Tool 10 GIG RJ
Product code: TL0004
Designed for 10Gig termination, with a handy lock button. This mini crimping tool allows you to 2-step crimp simply and efficiently.
After terminating the pins of the modular plug, you can switch to the back end to crimp. This lets you crimp the external ground of the Cat 6A connector.
Applications: FJ45 Cat6A connectors / RJ11 & 12 connectors
4. PEX crimping tools
A form of flexible plastic used for installing PEX pipes. It is easier to install and join lengths of plastic than copper or steel tubing.
Even better, it does not require welding—specialised PEX crimping tools will do.
5. Amp crimp tools
Amp connectors are multi-pin devices fitted within plastic housing. Specialist amp crimpers apply precise force. This is required to form a strong connection with suitable cabling.
6. RJ45 crimp tools
A flexible and powerful handheld crimper, compatible with:
- CAT5e
- CAT6
- CAT6A
- CAT7 terminals
Have a look at our modular crimping tools compatible with RJ45.
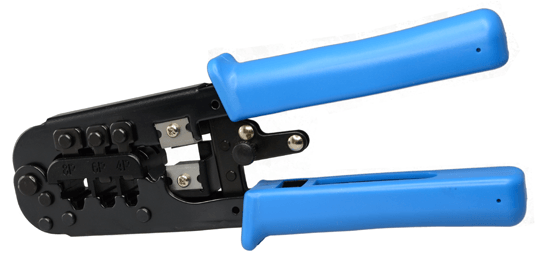
Modular Crimping Tool – 6Pin RJ11/12, 8Pin RJ45
Product code: JTH1935
A lightweight, durable and compact modular crimping tool. It is ideal for Ethernet modular plugs: 6P2C, 6P4C – RJ11, 6P6C – RJ12, 8P – RJ45.
Easy and efficient cutting and stripping of wire with one operation.
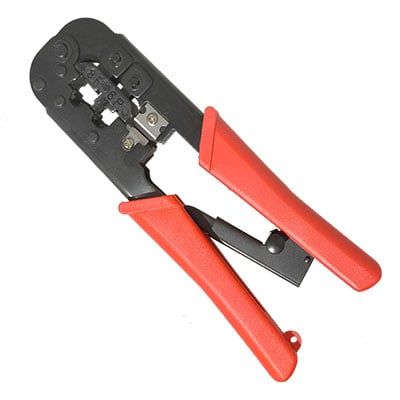
RJ11/12/45 Crimp Tool
Product code: TL0002
It features a ratchet-type locking system for both storage and cutting applications. You can cut 4, 6, and 8 flat wire cables for it to be able to fit into its relevant RJ type connector.
6. RJ9 crimp tools
A widely used handheld crimp tool compatible with RJ45, RJ11 and RJ12 connectors. Moreover, the RJ9 has three dies (crimping heads).
How to Use a Crimping Tool: The Bottom Line
Without the correct crimping tool, the cable can be compromised. But choosing the right one ensures your cable terminators—the device, in general—are safe.
The correct usage of this handy equipment also plays a vital role. This allows you to fix wiring heads to connectors or terminals precisely. As a result, you formed the exact electrical union.
By reading our ‘how to use a crimping tool’ guide, you already have that advantage!
© Electrotech Brands Pty Ltd 2022
Write a Comment
You must be logged in to post a comment.