

Heat Shrink Tubing Size Guide: Choose the Right Diameter and Shrink Ratio
July 23, 2026
Heat Shrink Tubing Size Guide: Choose the Right Diameter and Shrink Ratio
Choosing heat shrink tubing is not simply a matter of matching the tubing diameter to the wire.
The tubing must be large enough to slide over the widest part of the connection while also shrinking tightly around the narrowest section. You also need to consider the shrink ratio, wall construction, operating environment and heating method.
This heat shrink tubing size guide explains how to choose between 2:1, 3:1 and higher shrink ratios without relying on guesswork.
Quick answer: Choose tubing with an expanded diameter slightly larger than the widest part it must pass over. Its recovered diameter should be smaller than the narrowest section it needs to grip.
Explore the complete range of heat shrink tubing for electronics, automotive, communications, manufacturing and workshop projects.
What Do Heat Shrink Tubing Sizes Mean?
Heat shrink tubing is normally identified by its diameter before heating and its shrink ratio.
The two most important measurements are:
- Expanded diameter: The internal diameter before heat is applied.
- Recovered diameter: The approximate internal diameter after the tubing has fully shrunk.
The expanded diameter determines whether the tubing will fit over the wire, terminal or connector.
The recovered diameter determines whether it will form a close fit after heating.
A tube can slide over the connection successfully and still be unsuitable if its recovered diameter remains too large.
How Do Heat Shrink Ratios Work?
The shrink ratio compares the original expanded diameter with the approximate recovered diameter.
| Shrink ratio | Approximate recovery | Most suitable for |
|---|---|---|
| 2:1 | Half the expanded diameter | Straight wires, solder joints and components with similar diameters |
| 3:1 | One-third of the expanded diameter | Connectors, crimp terminals and uneven changes in diameter |
| 4:1 | One-quarter of the expanded diameter | Large connectors, cable breakouts and substantial diameter differences |
These ratios are nominal. Always check the dimensions and technical information supplied with the individual product.
When to Use 2:1 Heat Shrink Tubing
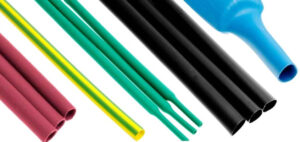
A 2:1 shrink ratio is the most straightforward option for general electronics and cable work.
For example, nominal 10mm tubing with a 2:1 ratio can recover to approximately 5mm.
It is useful when:
- The wire and connection have similar diameters
- You are covering a straight soldered joint
- You are insulating component leads
- You are colour-coding wires
- You are bundling a small group of cables
- You want a thin, flexible protective layer
Wiltronics supplies 2:1 heat shrink tubing by the metre in a wide selection of diameters and colours.
When to Use 3:1 Heat Shrink Tubing
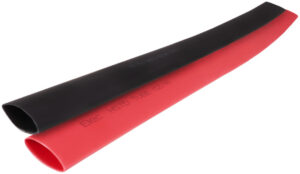
A 3:1 ratio accommodates a greater difference between the expanded and recovered diameters.
For example, nominal 12mm tubing with a 3:1 ratio can recover to approximately 4mm.
This is particularly useful when the tubing must pass over a wide connector or crimp before shrinking around a narrower cable.
Choose 3:1 tubing when:
- A terminal is significantly wider than the wire
- A cable joint has an irregular shape
- The tubing must pass over a connector body
- Additional sealing or strain relief is needed
- One piece of tubing must cover several different diameters
For applications requiring an adhesive inner layer, consider 3:1 glue-lined dual-wall heat shrink.
When Is a Higher Shrink Ratio Useful?
A higher ratio can be helpful when tubing needs to pass over a particularly wide plug, connector or cable breakout.
However, a higher ratio is not automatically better.
Consider the wall thickness, flexibility and product specifications as well as the ratio. Thick tubing may provide more mechanical protection but can be less suitable for small, flexible electronics leads.
How to Calculate the Correct Heat Shrink Size
Use the following method before ordering or cutting the tubing.
Step 1: Measure the Widest Part
Measure the widest point the tubing must pass over.
This may be:
- A crimp terminal
- A soldered splice
- A connector body
- A cable lug
- A plug
- A group of wires
Do not measure only the cable insulation when the tubing must also pass over a larger component.
Step 2: Measure the Narrowest Part
Measure the narrowest area that the tubing must grip after shrinking.
This is often the wire or cable insulation on either side of the connection.
Step 3: Choose the Expanded Diameter
Select tubing with an expanded internal diameter slightly larger than the widest measurement.
Tubing that only just matches the widest point may be difficult to install, particularly over an uneven crimp or connector.
Step 4: Check the Recovered Diameter
Confirm that the recovered diameter will be smaller than the narrowest measurement.
If the recovered diameter is equal to or larger than the cable, the tubing may remain loose.
Step 5: Allow for Length Changes
Heat shrink tubing can also contract slightly along its length.
Cut the tubing long enough to overlap the existing insulation on both sides of the connection. Consult the product specifications when precise finished dimensions are important.
Worked Heat Shrink Sizing Example
Imagine that a crimp connector is 8mm wide and the insulated cable is 4mm wide.
An 8mm piece of 2:1 tubing would be a poor choice:
- It may be difficult to slide over the 8mm connector.
- Its nominal recovered diameter would be approximately 4mm.
- It leaves little margin for either installation or recovery.
A 9mm or 12mm 3:1 product may be more suitable because it can pass over the connector and recover below the cable diameter.
The exact choice depends on the dimensions listed for the individual tubing rather than the ratio alone.
Heat Shrink Sizing Checklist
Before choosing a product, confirm that:
- The expanded diameter exceeds the widest component
- The recovered diameter is smaller than the cable
- The tubing is long enough to overlap both sides
- The wall thickness suits the project
- The material suits the operating environment
- The shrink temperature suits nearby components
- The colour is appropriate for identification
- The connection can tolerate the required heat
Single-Wall or Glue-Lined Heat Shrink?
Shrink ratio and wall construction describe different characteristics.
A product can have a 2:1 or 3:1 ratio and also be single-wall, dual-wall, medium-wall or heavy-wall.
Single-Wall Heat Shrink
Single-wall tubing provides a flexible layer around the cable or component.
It is commonly used for:
- General electrical insulation
- Electronics projects
- Colour coding
- Light strain relief
- Covering soldered connections
- Organising small wire bundles
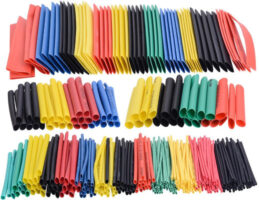
For workshops requiring multiple sizes, the 328-piece assorted heat shrink tubing pack provides a selection of 2:1 polyolefin tubing.
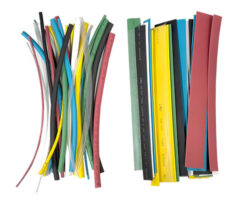
The Ultimate Heatshrink Pack is another useful option for keeping assorted sizes and colours at an electronics bench.
Glue-Lined Dual-Wall Heat Shrink
Glue-lined tubing contains an adhesive layer that softens as heat is applied.
As the outer tube contracts, the adhesive fills small gaps around the cable and connection.
It is useful for:
- Automotive accessory wiring
- Outdoor low-voltage connections
- Connections exposed to dirt or moisture
- Cable entry points
- Applications requiring additional strain relief
- Irregularly shaped joints
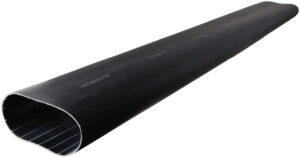
For more robust protection, 3:1 glue-lined heavy-wall heat shrink is available in several diameters.
Adhesive-lined heat shrink can improve environmental protection, but product suitability still depends on the installation, cable, connector and operating conditions.
Which Heat Shrink Product Should You Choose?
| Project | Recommended option |
|---|---|
| Small electronics joint | General-purpose 2:1 tubing |
| Mixed workshop repairs | Assorted tubing pack |
| Wire identification | Multi-colour tubing |
| Uneven terminal or connector | 3:1 tubing |
| Additional moisture protection | Glue-lined dual-wall tubing |
| Heavy mechanical protection | Glue-lined heavy-wall tubing |
| Flexible cable bundling | Braided heat-shrink sleeving |
| Integrated wire splice | Heat-shrink solder splice |
For Everyday Electronics Work
The Heatshrink Per Metre 2:1 range is suited to routine insulation, colour coding and cable protection.
It is available in multiple sizes and colours, making it easier to select tubing for a particular project rather than buying only pre-cut pieces.
For Colour Coding and Organised Storage
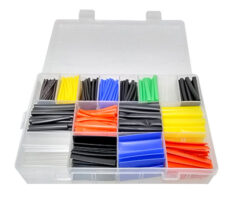
The Multi Colour Heatshrink Tubing 580-Piece Pack provides assorted 2:1 tubing organised in a storage case.
Different colours can help identify:
- Positive and negative conductors
- Power and signal wiring
- Separate channels
- Classroom project groups
- Matching cable ends
- Different sections of a wiring harness
For Cable Bundles and Abrasion Protection
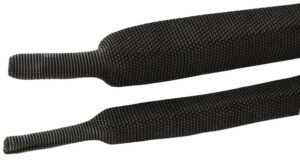
Working with braided heat-shrink sleeving can provide a flexible finish around compatible cable groups.
Braided sleeving may be useful where flexibility and abrasion resistance are more important than creating a conventional smooth tube.
For Joining Compatible Wires
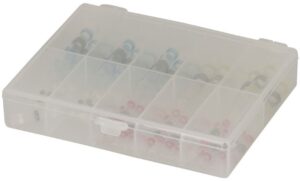
A heat-shrink solder splice pack combines heat-shrink material with a solder ring for compatible wire-joining applications.
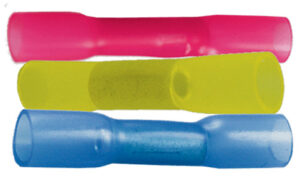
Another option is a pack of heat-shrinkable butt splice connectors, which combines a crimped connection with a heat-shrinkable outer section.
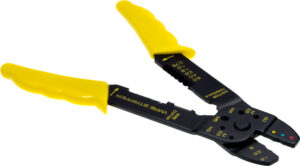
Select the connector according to the wire size and use the correct crimping tools for the terminal.
What Tools Are Needed?
A typical installation may require:
- Heat shrink tubing
- Heat gun
- Ruler or callipers
- Wire cutters
- Wire strippers
- Crimping tool where required
- Heat-resistant work surface
- Eye protection
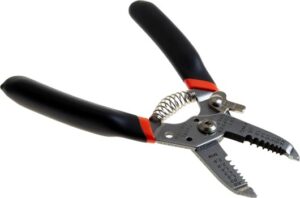
Prepare the conductor cleanly with suitable wire strippers rather than cutting into the strands with a knife.
Browse the full selection of heat guns when choosing a controlled heat source.
Temperature-Controlled Heat Gun
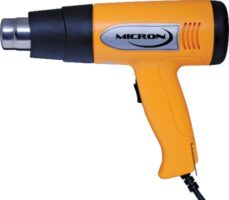
The Temperature Controlled Heat Gun 1500W provides variable temperature adjustment for controlled heating.
This is useful when working near cable insulation, plastic connectors or other components that may be affected by excessive heat.
Heat Gun with Heat Shrink Accessory
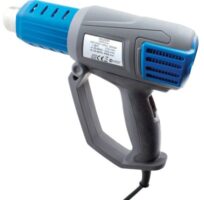
The Heat Gun with Heatshrink Accessory includes an attachment intended to help direct heat around the tubing.
A purpose-designed heat gun normally gives a more controlled and even result than an open flame.
How to Apply Heat Shrink Tubing Correctly
Once the correct size has been selected, the application process is straightforward.
1. Isolate the Circuit
Disconnect every power source before working on the wiring.
Do not work on energised equipment. Fixed mains wiring should be handled by an appropriately licensed electrician.
2. Cut the Tubing
Cut a clean section long enough to overlap the intact cable insulation on both sides of the connection.
3. Slide It onto the Wire
Fit the tubing before making a permanent soldered or crimped joint.
Move it far enough away from the work area that it will not shrink prematurely.
4. Complete the Connection
Make the soldered or crimped connection and check that it is mechanically secure.
For help producing reliable soldered joints, see How to Solder Electronics Properly.
5. Centre the Tubing
Allow soldered joints to cool before sliding the tubing into position.
Ensure the tubing overlaps undamaged insulation on both sides.
6. Apply Heat Evenly
Begin with controlled heat and keep the heat gun moving.
For longer sections, work from the centre towards the ends. Rotate the cable where it is safe to do so.
7. Stop Once Fully Recovered
Stop heating when the tubing has formed a close, even fit.
Excessive heat may split the tubing, damage the cable insulation or deform nearby plastic components.
8. Cool and Inspect
Allow the connection to cool naturally.
The finished tubing should be:
- Evenly contracted
- Free from splits and scorch marks
- Secure at both ends
- Centred over the connection
- Closely fitted to the cable
- Overlapping the original insulation
Common Sizing Mistakes
Choosing Tubing by Wire Diameter Alone
Always measure the widest connector or terminal that the tubing must pass over.
Ignoring the Recovered Diameter
Large tubing may fit over the joint but remain loose after heating.
Check both the expanded and recovered dimensions.
Assuming All 3:1 Tubing Is the Same
Products with the same ratio may have different expanded diameters, recovered diameters, wall thicknesses and temperature requirements.
Using the Highest Ratio for Every Project
A higher ratio is not necessary for a straight joint with minimal diameter change.
General-purpose 2:1 tubing may produce a thinner, more flexible finish.
Forgetting to Install the Tubing First
Slide the tubing onto the wire before completing the connection.
This is especially important when the finished plug or terminal will be too large for the tubing to pass over.
Applying Too Much Heat
Keep the heat gun moving and stop when recovery is complete.
Do not continue heating in an attempt to make incorrectly sized tubing fit more tightly.
Heat Shrink Tubing or Electrical Tape?
| Heat shrink tubing | Electrical insulation tape |
|---|---|
| Forms a close-fitting sleeve | Wraps around an existing item |
| Requires controlled heat | Does not require heating |
| Produces a consistent finish | Adapts easily to irregular shapes |
| Must often be installed before joining wires | Can be applied after assembly |
| Available in different shrink ratios | Available in different widths and colours |
Heat shrink is often preferred for a clean, permanent-looking cable joint. Tape remains useful where tubing cannot be slid into position or where a removable wrap is more practical.
Frequently Asked Questions
What size heat shrink tubing do I need?
Choose tubing with an expanded diameter larger than the widest part of the connection and a recovered diameter smaller than the cable it must grip.
Is 2:1 or 3:1 heat shrink better?
Neither ratio is universally better.
Use 2:1 tubing for straight joints and similar diameters. Use 3:1 tubing when the sleeve must pass over a wider connector before shrinking around a narrower cable.
What does 10mm 2:1 heat shrink mean?
It generally indicates tubing with an expanded diameter of approximately 10mm that can recover to approximately 5mm.
Check the individual product specifications for exact dimensions.
Can heat shrink tubing be too large?
Yes. Oversized tubing may still be loose after full recovery.
Always check the recovered diameter before selecting it.
Should heat shrink be tight before heating?
No. It needs enough clearance to slide over the connection.
The tubing should become secure as it recovers under controlled heat.
Does glue-lined heat shrink have a shrink ratio?
Yes. Adhesive lining and shrink ratio are separate characteristics.
For example, a product can be glue-lined and have a 3:1 shrink ratio.
Can I shrink tubing with a cigarette lighter?
An open flame can scorch the tubing, damage the underlying cable and create uneven heating.
A suitable heat gun provides better control and does not introduce a direct flame.
Can heat shrink repair a broken wire?
Heat shrink tubing can insulate and protect a correctly completed connection. It does not reconnect broken conductors by itself.
The wire must first be joined using an appropriate soldered, crimped or other approved connection method.
Choose Heat Shrink Tubing with Confidence
Correct sizing comes down to two measurements:
- The tubing must expand over the widest component.
- It must recover below the diameter of the surface it needs to grip.
Use 2:1 tubing for simple, even connections. Select 3:1 tubing for wider terminals and irregular joints. Choose glue-lined tubing where additional sealing and strain relief are required.
Browse Wiltronics’ complete range of heat shrink tubing, sleeves and application tools, along with compatible cables and wires, connectors and terminals and workshop tools.
© Electrotech Brands Pty Ltd 2026
Write a Comment
You must be logged in to post a comment.