

Desoldering Pump or Solder Wick: How to Use Both
July 30, 2026
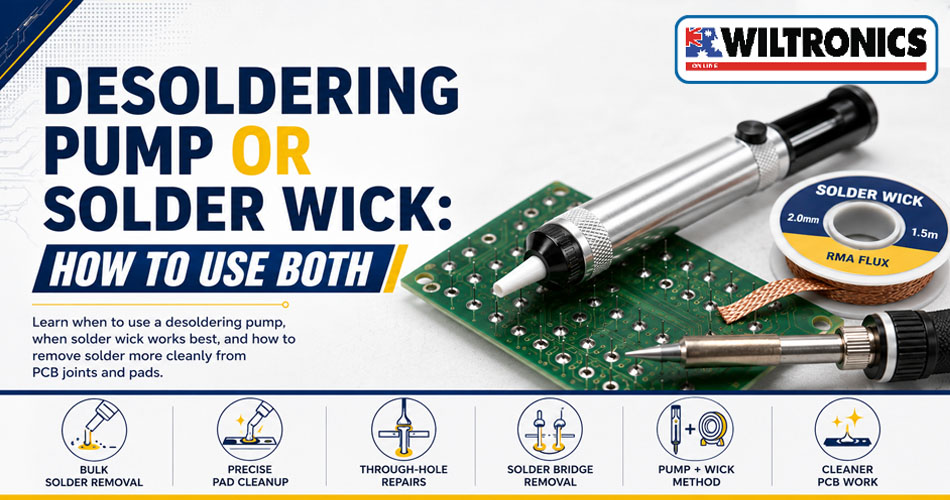
Desoldering Pump or Solder Wick: How to Use Both
Removing solder cleanly is an essential skill for repairing, modifying and troubleshooting electronic circuits.
Two of the most accessible tools are the desoldering pump, commonly called a solder sucker, and desoldering wick, also known as solder braid.
A pump uses a short burst of suction to remove molten solder. Wick uses fine copper braid to absorb molten solder through capillary action.
Each method has different strengths:
- Use a desoldering pump for larger solder deposits, through-hole component leads and clearing plated PCB holes.
- Use solder wick for solder bridges, flat pad cleanup and small amounts of excess solder.
- For stubborn through-hole joints, use the pump first and wick second.
Wiltronics stocks manual pumps, bulb-style solder suckers, fluxed wick, replacement tips, powered vacuum stations and related maintenance parts within its desoldering equipment range.
Desoldering Pump vs Solder Wick at a Glance
| Feature | Desoldering pump | Solder wick |
|---|---|---|
| How it removes solder | Vacuum suction | Copper braid absorbs molten solder |
| Best for | Through-hole joints and larger deposits | Bridges, flat pads and fine cleanup |
| Speed | Fast when positioned correctly | Slower but more controlled |
| Precision | Moderate | High |
| Reusable | Yes, after cleaning | No; saturated sections are discarded |
| Main technique challenge | Triggering suction while solder is molten | Controlling heat and lifting the braid correctly |
| Ideal role | Bulk removal | Final cleanup |
What Is a Desoldering Pump?
A manual desoldering pump contains a spring-loaded plunger and a heat-resistant nozzle.
The tool is primed before use. Once the solder has melted, the nozzle is placed close to the joint and the release button is pressed. The resulting vacuum draws molten solder into the pump chamber.
This method is particularly effective when removing:
- Through-hole resistors and capacitors
- Switches and relays
- Connector pins
- Larger solder blobs
- Solder surrounding component leads
- Solder from plated PCB holes
Manual Pump Options
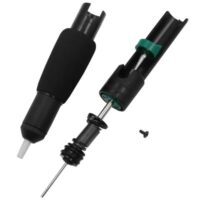
The Antistatic Desolder Tool is a plastic vacuum pump designed for electronics-repair solder removal.
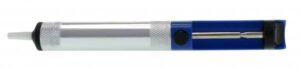
The K&W Desolder Tool uses a solid metal body, can be disassembled for cleaning and supports a replaceable nozzle.

For users wanting a larger plunger-style tool, the Goot GS-100 Soldapull Tool is another reusable manual option.
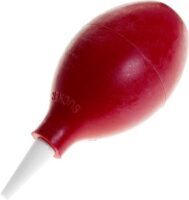
The Solder Sucker Bulb Type works differently: the bulb is squeezed before the tip is positioned, then released while the solder remains molten.
What Is Desoldering Wick?
Desoldering wick is fine copper braid placed between the soldering iron and the soldered joint.
When the braid and joint reach the solder’s melting temperature, molten solder flows into the gaps within the copper weave.
Some wick is supplied pre-fluxed. Unfluxed braid may need compatible electronics flux to improve solder flow.
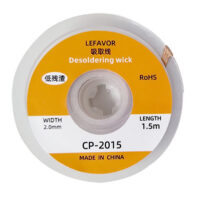
Wiltronics’ Goot Desoldering Wick 1.5m is saturated with RMA flux and currently comes in 2mm and 3mm widths.
Solder Wick Works Best For
- Cleaning solder from flat PCB pads
- Removing bridges between adjacent leads
- Correcting excessive solder
- Preparing pads for replacement components
- Surface-mount rework
- Removing the thin solder layer left after pumping
- Cleaning around small through-hole leads
Which Desoldering Tool Should You Choose?
| Task | Recommended method |
|---|---|
| Large through-hole solder joint | Pump first, then wick |
| Clearing a plated PCB hole | Pump |
| Small solder bridge | Wick |
| Cleaning a flat component pad | Wick |
| Removing a multi-pin connector | Pump and wick |
| Correcting excess solder | Wick |
| Removing a substantial solder blob | Pump |
| Final pad preparation | Wick |
| Frequent through-hole repair | Powered vacuum station |
For occasional electronics repair, the most versatile starting setup is one manual pump plus a roll of appropriately sized wick.
Tools and Materials You Will Need
Browse soldering iron stations when choosing a temperature-controlled heating tool.
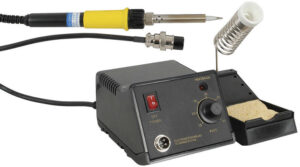
The 48W Temperature-Controlled Soldering Iron Kit provides an adjustable bench option for general electronics work.
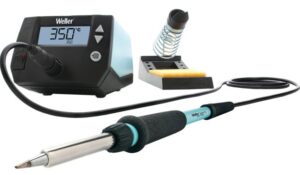
For regular professional bench use, the Weller WE1010 70W Soldering Station supports replaceable ET-series tips and controlled operation.
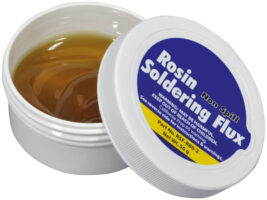
Additional flux can improve solder flow on older or oxidised joints. Browse solder flux paste and flux pens or use a targeted product such as the No-Clean Solder Flux Pen.
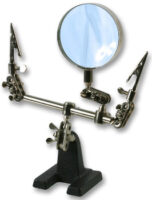
A board holder such as the Third-Hand Tool with Magnifying Glass can secure the PCB while both hands control the iron and desoldering tool.
Safety Before Desoldering
Disconnect the equipment from every source of power.
Remove batteries, unplug power supplies and follow the appropriate service procedure for stored energy such as charged capacitors. Never desolder an energised circuit.
Also:
- Wear eye protection
- Use a stable soldering-iron stand
- Work in suitable ventilation
- Keep fingers away from heated braid
- Let components cool before touching them
- Allow the PCB to cool between repeated attempts
- Wash your hands after handling solder and flux residue
A local extractor can help move fumes away from the breathing zone. Browse solder fume extractors or consider the Solder Fume Extractor with Carbon Filter for a suitable electronics bench.
How to Use a Desoldering Pump
Step 1: Secure the Circuit Board
Place the PCB on a stable, heat-resistant surface.
Orient it so you can reach the solder joint comfortably with both the iron and pump. Avoid holding the board by hand while operating two hot tools.
Step 2: Inspect the Joint
Identify:
- The component lead
- The copper pad
- The amount of solder present
- Nearby heat-sensitive parts
- Existing board damage
- Bent leads that may prevent removal
A lead folded tightly against the pad may remain mechanically trapped even after the solder has been removed.
Step 3: Prepare the Pump
For a plunger pump, press the plunger down until it locks.
For the bulb-style solder sucker, squeeze the bulb before positioning the nozzle.
Make sure the release control can be operated without moving the tool away from the joint.
Step 4: Clean and Tin the Iron Tip
Return the iron briefly to its stand and clean the tip using the station’s cleaning material.
Apply a small amount of solder to the tip. This thin coating improves heat transfer between the iron and the existing joint.
An oxidised or dry tip often makes desoldering slower and increases the time heat must be applied to the PCB.
Step 5: Add Flux or Fresh Solder
Old solder may not melt evenly.
Apply a small amount of suitable flux. Where necessary, add a little fresh solder to create a better thermal bridge between the tip, lead and pad.
Adding solder before removing it may appear counterintuitive, but it can help the entire joint become molten at the same time.
Step 6: Melt the Complete Joint
Place the iron tip so it contacts both the component lead and soldered pad.
Wait until the solder becomes fully fluid.
Do not trigger the pump when only the surface of the joint has melted. Partially molten solder is less likely to clear cleanly.
Step 7: Position the Pump Nozzle
Bring the nozzle immediately beside or around the component lead.
Keep it close to the molten solder without striking the PCB or forcing the soldering iron away from the joint.
Step 8: Trigger the Suction
Release the pump while the solder remains fully molten.
Keep the iron in contact until the suction begins, then remove both tools.
If the iron is removed too early, the solder may solidify before the pump can draw it away.
Step 9: Inspect the Result
Allow the joint to cool briefly, then inspect it under good lighting or magnification.
A successful pass may leave:
- A visible space around the lead
- A mostly clear plated hole
- Substantially less solder on the pad
- A lead that moves slightly when handled carefully
Do not pull forcefully on the component.
Step 10: Repeat Carefully
Prime the pump and repeat when necessary.
Allow the PCB to cool between attempts. Several rapid heating cycles can weaken the bond between the copper pad and board substrate.
How to Use Solder Wick
Step 1: Choose the Wick Width
Match the braid to the soldered area.
Use 2mm wick for smaller pads, fine leads and narrow bridges. Use 3mm wick for broader pads and larger deposits.
Wick that is much wider than the target area requires more heat and may warm neighbouring components unnecessarily.
Step 2: Apply Flux When Needed
Pre-fluxed wick can normally be used directly.
For old or oxidised joints, apply a small amount of compatible flux to the soldered area. Avoid saturating a long section of braid unnecessarily.
Step 3: Position Fresh Braid
Place a clean, unused section of wick directly over the solder.
Do not position a section that is already silver and saturated with solder over the next joint.
Step 4: Heat the Wick
Place the soldering tip on top of the braid directly above the joint.
A small chisel tip often transfers heat more effectively through the braid than an extremely fine point.
Apply light pressure only.
Step 5: Watch the Solder Flow
As the solder melts, it moves into the copper weave.
The braid changes appearance as it fills with solder.
Keep the wick still rather than dragging it across the PCB.
Step 6: Lift the Iron and Wick Together
Remove the iron and braid from the board at the same time.
Removing the iron first may allow the solder to cool and bond the wick to the pad.
When braid becomes stuck, do not pull it. Reheat the area gently, wait for the solder to melt and lift both together.
Step 7: Cut Away Used Wick
Trim the solder-filled section using side cutters.
Move to fresh copper before continuing.
Step 8: Inspect the Pad
Check that the pad is:
- Flat
- Firmly attached
- Free from bridges
- Free from loose braid strands
- Ready for the next repair step
Clean remaining flux residue where required using a cleaner compatible with the PCB and flux type.
The Best Combined Method: Pump First, Wick Second
For many through-hole repairs, use this sequence:
- Apply suitable flux.
- Add a small amount of fresh solder when necessary.
- Melt the complete joint.
- Use the pump to remove the bulk solder.
- Let the board cool briefly.
- Place fresh wick over the remaining solder.
- Heat the braid and lift it with the iron.
- Inspect the pad and plated hole.
- Confirm that the lead is free before removing the component.
This approach combines the speed of a pump with the control of wick.
It also reduces the amount of time the copper braid must remain heated against the PCB.
Example: Removing a Through-Hole Component
When replacing a resistor, capacitor, socket or connector:
- Identify every soldered lead.
- Stabilise the board.
- Apply flux to each joint.
- Add fresh solder where a joint does not melt evenly.
- Pump the bulk solder from each lead.
- Let the board cool.
- Use wick to clean the remaining solder.
- Check that every lead moves independently.
- Straighten accessible bent leads carefully.
- Remove the component without pulling against attached pads.
- Inspect the holes before fitting the replacement.
For multi-pin components, clear every pin before attempting removal. One remaining soldered lead can lift a pad or damage a plated-through hole if the component is forced.
Example: Removing a Solder Bridge
Wick is usually the better choice for solder connecting two adjacent pads or leads.
- Apply a small amount of flux.
- Position narrow wick over the bridge.
- Place a clean soldering tip on the braid.
- Wait for the solder to flow into the wick.
- Lift the iron and braid together.
- Trim the saturated section.
- Inspect the leads under magnification.
- Test for unintended continuity where appropriate.
A pump may be too large and imprecise around closely spaced surface-mount leads.
Common Desoldering Mistakes
Triggering the Pump Too Late
The solder may solidify between removing the iron and pressing the release button.
Keep the joint molten until suction starts.
Using a Dirty or Dry Tip
An oxidised tip transfers heat poorly.
Clean and tin the tip before working on a difficult joint.
Applying Too Much Pressure with Wick
The iron should heat the braid rather than press it into the PCB.
Excessive force can damage pads and solder mask.
Pulling Stuck Wick
Cold wick can lift the pad when pulled.
Reheat it and remove the iron and braid together.
Using Saturated Braid
Once a section has absorbed solder, cut it away.
Filled braid cannot continue absorbing solder efficiently.
Reheating Too Many Times Without Cooling
Repeated long heating cycles can weaken PCB pads, vias and nearby component bodies.
Pause between attempts.
Choosing Wick That Is Too Wide
Oversized wick absorbs more heat and can warm surrounding parts unnecessarily.
Match the width to the joint.
Forcing the Component Out
A component that does not release still has solder or a bent lead holding it.
Find the obstruction instead of applying more pulling force.
Using a Blocked Pump
Collected solder and flux residue reduce suction.
Empty and maintain the tool before continuing.
Troubleshooting
The Pump Removes Very Little Solder
Check whether:
- The solder is fully molten
- The nozzle is close enough
- The pump is completely primed
- The nozzle is blocked
- The joint needs flux
- The soldering tip is transferring enough heat
- Internal seals need cleaning
The Wick Does Not Absorb Solder
Possible causes include:
- The section is already saturated
- The braid needs additional flux
- The soldering tip is dirty
- The tip is too small
- The wick is too wide
- The solder has not fully melted
The PCB Hole Will Not Clear
Try:
- Adding a small amount of fresh solder
- Applying flux
- Heating the whole joint
- Pumping again while fully molten
- Cleaning the edges with wick
- Checking whether the lead is bent against the hole
Do not routinely drill through plated PCB holes as a substitute for controlled solder removal.
The Pad Begins to Lift
Stop applying heat and force.
A lifted pad may require track repair or a jumper-wire solution. Continuing to pull the component can cause more damage.
Maintaining Manual Desoldering Pumps
Regular cleaning helps maintain suction.
After use:
- Eject loose solder into a suitable waste container
- Allow the pump to cool
- Disassemble it only as instructed
- Remove solder fragments
- Check the nozzle for blockage
- Inspect springs and seals
- Replace damaged nozzles
- Reassemble the pump securely
The K&W tool supports the Replacement Tip for SI3010, while the Goot GS-100 supports the SI3015 Replacement Tip. These spare parts can extend the useful life of the corresponding pumps.
When to Upgrade to a Powered Desoldering Station
A manual pump and wick are appropriate for occasional repairs.
A powered vacuum station becomes useful when you regularly remove:
- Multi-pin through-hole connectors
- DIP sockets
- Relays
- Transformers
- Repeated production components
- Components across many circuit boards
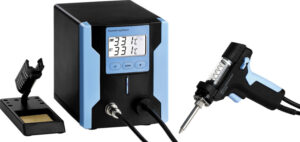
The 90W Temperature-Controlled Vacuum Desoldering Station combines controlled heating and powered suction in one dedicated tool.
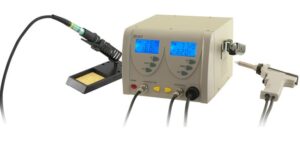
The ZD917 2-in-1 Soldering and Desoldering Station combines a conventional soldering iron and vacuum desoldering gun for a repair-focused bench setup.
Wiltronics also supplies maintenance items for compatible powered equipment, including:
The current desoldering category lists manual tools, wick, powered stations, filters, nozzles and replacement tips as separate purchase paths.
Product Selection Guide
| Requirement | Wiltronics product |
|---|---|
| Entry-level manual solder removal | Antistatic Desolder Tool |
| Durable metal pump | K&W Desolder Tool |
| Larger plunger-style pump | Goot GS-100 Soldapull Tool |
| Bulb-operated suction | Solder Sucker Bulb Type |
| Small and medium pad cleanup | Goot Desoldering Wick 1.5m |
| Replacement K&W nozzle | Replacement Tip for SI3010 |
| Replacement Goot nozzle | SI3015 Replacement Tip |
| Frequent through-hole work | 90W Vacuum Desoldering Station |
| Combined repair station | ZD917 2-in-1 Soldering and Desoldering Station |
| Vacuum-station maintenance | ATT2065 Filter Pack |
| Alternate powered-tool tip sizes | ATT2065 Round Desoldering Tips |
| Stable PCB handling | Third-Hand Tool with Magnifying Glass |
| Targeted flux application | No-Clean Solder Flux Pen |
| Bench fume management | Solder Fume Extractor with Carbon Filter |
| Entry-level controlled heating | 48W Temperature-Controlled Soldering Kit |
| Higher-performance soldering bench | Weller WE1010 Soldering Station |
Desoldering Checklist
Before Starting
- Equipment is disconnected from power
- Stored energy has been handled correctly
- PCB is secured
- Pump and wick are ready
- Tip is clean and tinned
- Flux is available
- Work area is ventilated
- Eye protection is worn
During Desoldering
- Whole joint is molten before pumping
- Pump nozzle is close to the joint
- Wick width matches the pad
- Only light pressure is applied
- Iron and braid are lifted together
- Saturated wick is trimmed
- PCB is allowed to cool
- Component is never forced
After Desoldering
- Pads remain attached
- PCB holes are clear where required
- No solder bridges remain
- Flux residue is cleaned where necessary
- Pump is emptied
- Nozzle is inspected
- Used wick is discarded appropriately
- Board and component are checked for damage
Frequently Asked Questions
Is a desoldering pump or solder wick better?
A pump is better for larger solder deposits and through-hole joints. Wick is better for precision cleanup, bridges and flat pads.
For many repairs, the best method is to use the pump first and wick second.
Should I add fresh solder before desoldering?
A small amount of fresh solder can improve heat transfer and help an old joint melt evenly.
It is particularly useful when the existing solder is oxidised or difficult to heat.
Why does solder wick stick to the PCB?
The solder cooled while the braid remained against the pad.
Reheat the wick gently and lift it together with the iron. Do not pull cold braid from the board.
What width of solder wick should I use?
Choose a width similar to the pad or solder deposit.
The current Wiltronics Goot wick is available in 2mm and 3mm sizes.
Check the plunger, nozzle, internal chamber and seals before repeating the attempt.
Can desoldering damage a PCB?
Yes. Excessive heat, pressure, repeated attempts or forceful component removal can lift pads and damage plated holes.
Work efficiently and let the board cool.
When should I buy a powered desoldering station?
Consider a powered vacuum station when removing through-hole components frequently or working with multi-pin connectors and repeated repairs.
Do I still need wick when I own a vacuum station?
Wick remains useful for cleaning flat pads, correcting bridges and removing small traces of solder that remain after vacuum removal.
Remove Solder with Better Control
A desoldering pump and solder wick perform different but complementary jobs.
Use the pump to remove larger quantities of molten solder quickly. Use wick for controlled cleanup, solder bridges and final pad preparation. On difficult through-hole joints, combine both methods rather than repeatedly applying one tool.
The best results come from complete solder melting, good heat transfer, suitable flux, correct timing and patience between attempts.
Browse Wiltronics’ full range of desoldering pumps, solder wick, replacement tips and vacuum stations, along with soldering stations, solder flux, soldering accessories and fume-extraction equipment.
© Electrotech Brands Pty Ltd 2026
Write a Comment
You must be logged in to post a comment.